- Languages
- English
- Popular FAQ
-
Antbuddy Privacy / Date: 17/07/2017 3:12PM View count: 122470
-
Hướng dẫn cài đặt và sử dụng Zoiper trên iOS và Android / Date: 28/12/2018 4:28PM View count: 16327
-
Hướng dẫn cài đặt và sử dụng Grandstream wave trên iOS và Android (Antbuddy) / Date: 28/12/2018 4:26PM View count: 12381
-
Ticket là gì ? Sử dụng như thế nào? / Date: 08/09/2020 9:46AM View count: 11259
-
Hướng dẫn sử dụng chiến dịch BeeIQ Telesales (dành cho quản trị viên) / Date: 08/09/2017 10:24AM View count: 7878
-
Các thao tác chính trong BeeIQ CRM / Date: 08/09/2017 10:36AM View count: 7224
-
Hướng dẫn sử dụng Hệ thống Ticketing trên BeeIQ CRM / Date: 08/09/2017 10:37AM View count: 7063
-
Hướng dẫn cấu hình Email Forwarding BeeIQ CRM / Date: 08/09/2017 10:37AM View count: 6428
-
Hướng dẫn sử dụng Kite Chat (dành cho quản trị viên) / Date: 11/07/2017 7:37PM View count: 6412
-
Video hướng dẫn cài đặt và sử dụng Tổng đài Cloud AntBuddy / Date: 13/09/2017 3:39PM View count: 6360
AntCRM - How to configure account for Sales package
I. Introduction
AntCRM is a comprehensive toolkit for Sales teams in the 4.0 era with the following features:
Update Potential Customers continuously with connections from campaigns
Automate customer support processes to increase sales closing potential
Connect with customers on every channel
Capture the customer journey through each stage
Automate your business's individual Sales processes
II. Configure AntCRM account for Sales package
To be able to configure an account for the Sales service, you must successfully register and log in to your AntCRM account, see registration and login instructions here.
Choose service:
After logging in successfully, the page redirects to the Choose service page, where you choose Sales to start creating an account.
Creating AntCRM account for Sales consist of the following setup steps:
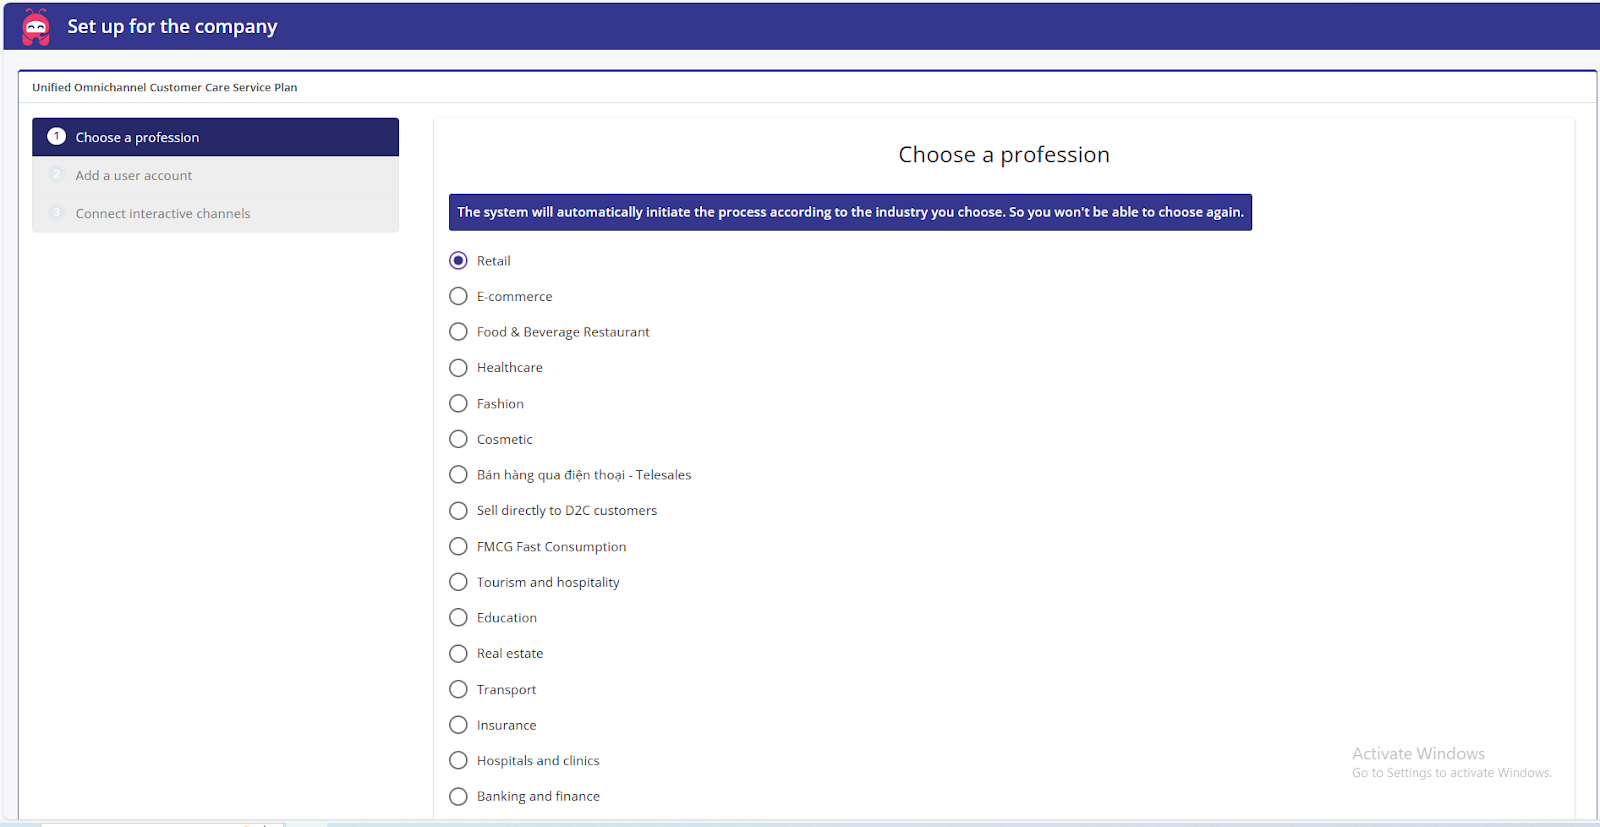
1. Choose profession
Choose a profession that is suitable for the company
For each chosen industry, the system will create data appropriate to the industry.
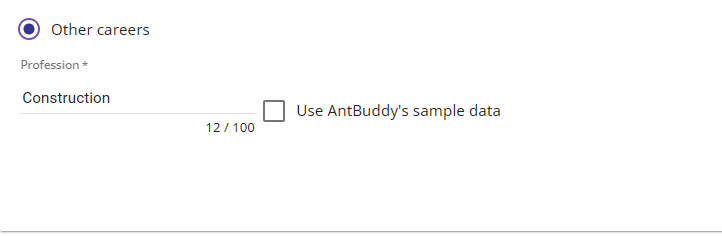
If your company's industry is different from the above, please choose "Other industries" and enter the industry name.
For example: "Construction" industry as shown below
After choosing your career, click on button to go to the next part.
Note: After going to the next step, when you return, you cannot edit the Industry. Please choose the correct industry before going to the next step.
2. Connect the interactive channel
In step 1. Choose interactive channels, however many interactive channels you choose, there will be as many configuration items in step 5 (except for the Web Form section which will need configuration by the technical team).
Assuming that step 1 selected all channels, then step 5 will have 6 tabs corresponding to 6 configuration pages
:
Phone
Email
Message
Facebook Fanpage
Zalo Official Account
Live Chat Web
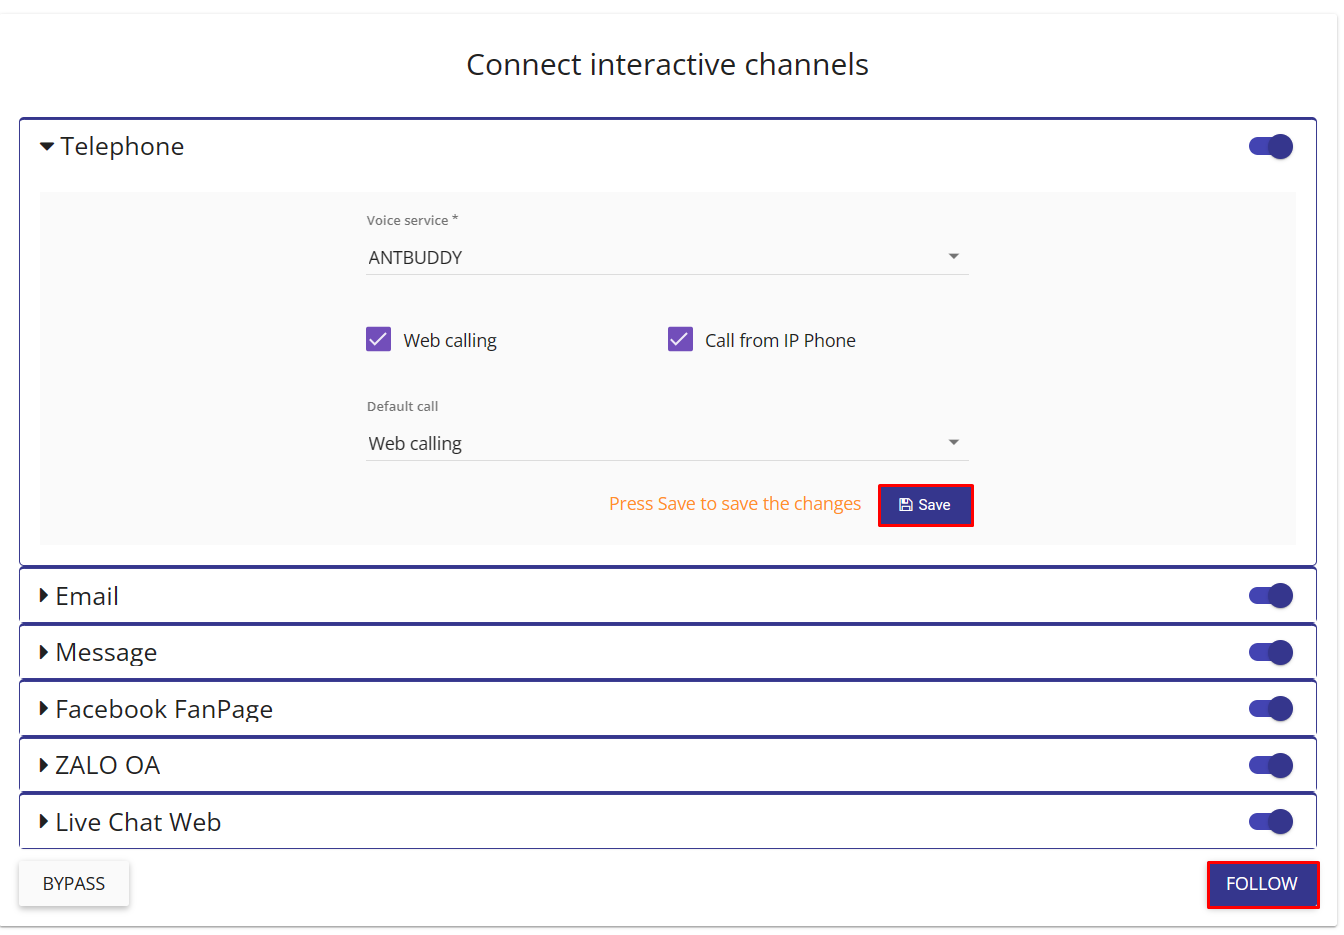
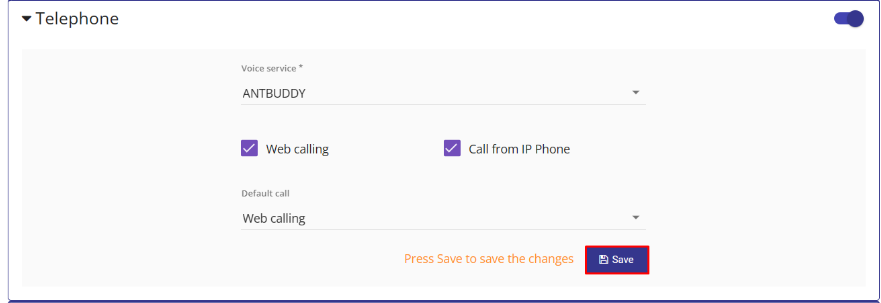
3. Connect Call
The system will allow connection to Antbuddy switchboard or other providers, there are 2 types of calls:
Web calling
Call from IP phone
The system will initialize and choose the calling device on the web, you can change to another device if available.
Remember to press button after each change.
4. Add user account
You need to determine how many employees your business needs to use CRM, and determine the rights and groups of employees to start adding accounts.
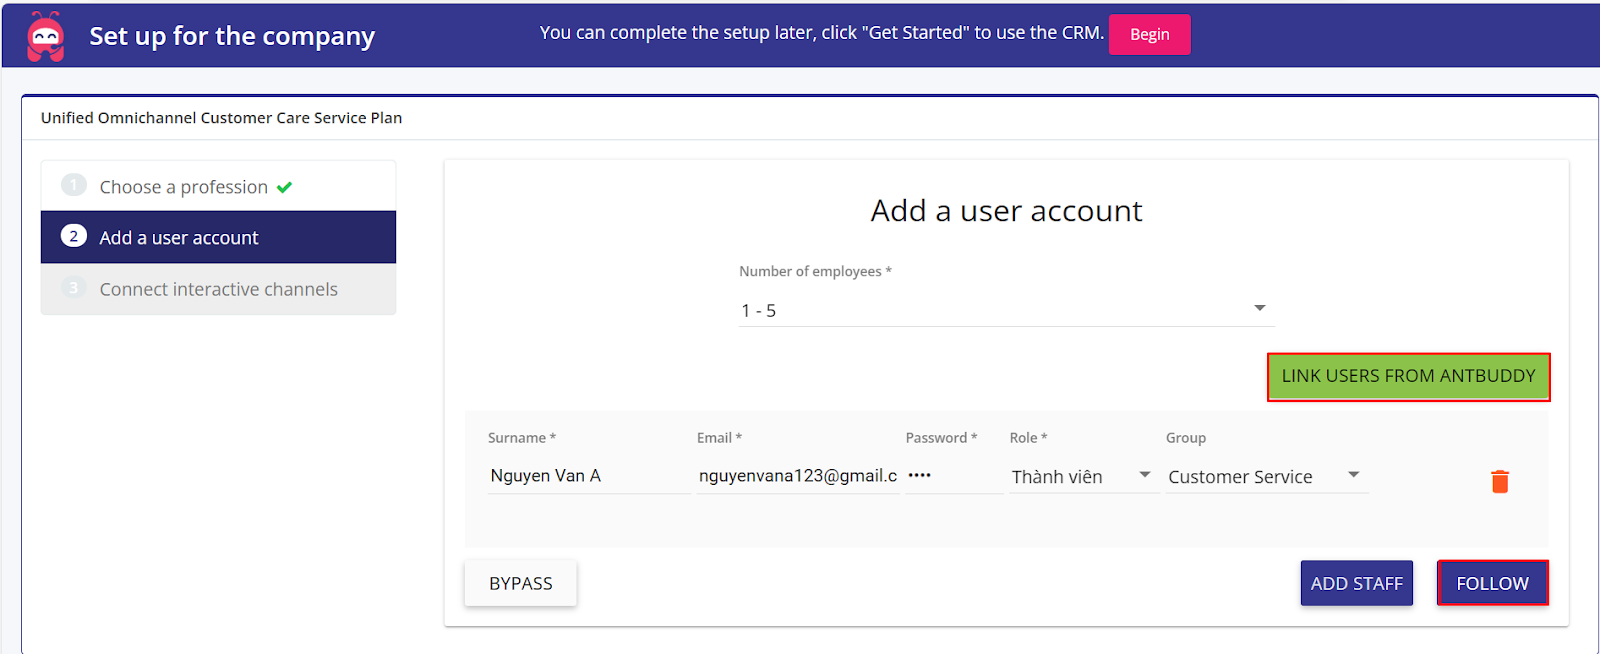
Step 1. Select the number of employees, with the following employee levels:
1 to 5 people
6 to 10 people
11 to 20 people
21 to 50 people
51 to 100 people
Step 2. Press Add staff to add the first staff

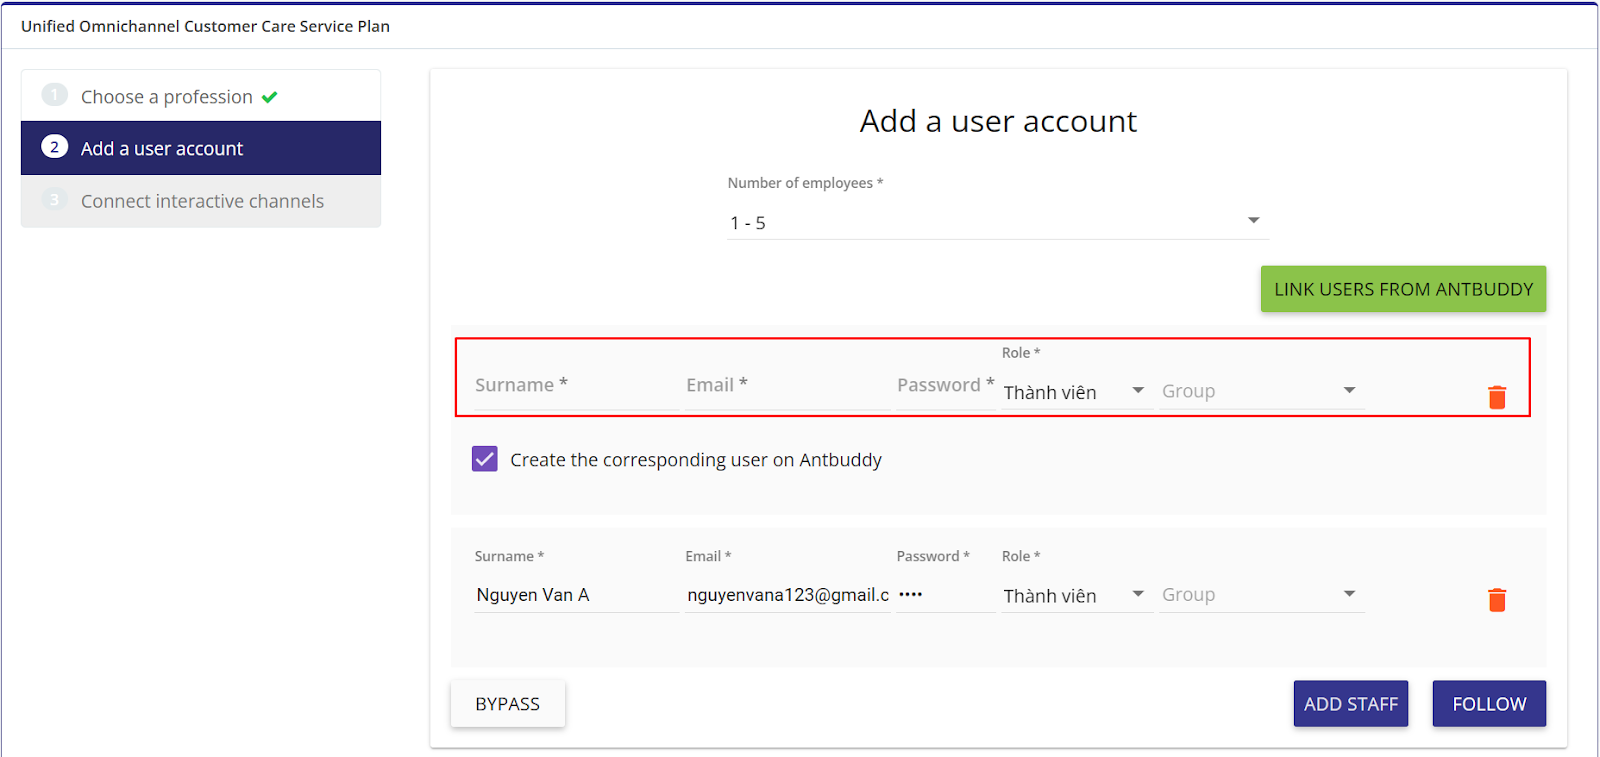
In which:
Role: is the right, including 2 rights: Member and Admin. Depending on the selected right, the system will initialize viewing and operating rights for that employee.
Group: There are 2 basic groups: Customer Service and Data Owner, you can customize and add employees to these groups
The Customer Service group is the customer care and support group
The Data Owner group is a group for administrators, with special permissions
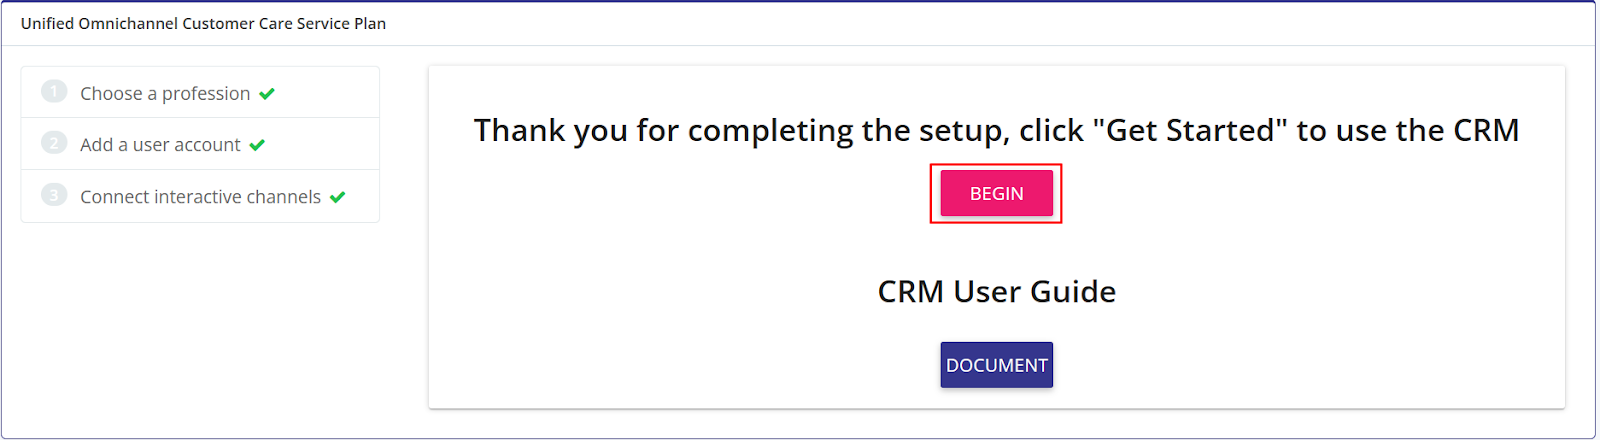
After adding the employee list successfully, click on button to complete the setup.
Click the BEGIN button to start using AntCRM services.