- Languages
- English
- Popular FAQ
-
Antbuddy Privacy / Date: 17/07/2017 3:12PM View count: 122336
-
Hướng dẫn cài đặt và sử dụng Zoiper trên iOS và Android / Date: 28/12/2018 4:28PM View count: 16295
-
Hướng dẫn cài đặt và sử dụng Grandstream wave trên iOS và Android (Antbuddy) / Date: 28/12/2018 4:26PM View count: 12344
-
Ticket là gì ? Sử dụng như thế nào? / Date: 08/09/2020 9:46AM View count: 11209
-
Hướng dẫn sử dụng chiến dịch BeeIQ Telesales (dành cho quản trị viên) / Date: 08/09/2017 10:24AM View count: 7850
-
Các thao tác chính trong BeeIQ CRM / Date: 08/09/2017 10:36AM View count: 7198
-
Hướng dẫn sử dụng Hệ thống Ticketing trên BeeIQ CRM / Date: 08/09/2017 10:37AM View count: 7038
-
Hướng dẫn cấu hình Email Forwarding BeeIQ CRM / Date: 08/09/2017 10:37AM View count: 6406
-
Hướng dẫn sử dụng Kite Chat (dành cho quản trị viên) / Date: 11/07/2017 7:37PM View count: 6390
-
Video hướng dẫn cài đặt và sử dụng Tổng đài Cloud AntBuddy / Date: 13/09/2017 3:39PM View count: 6336
Antbot - Instruction on how to operate Chatbot
Instruction on how to operate Chatbot
Channel integration
Basic instructions to integrate pages in Omni Channel in AntCRM, for details, please follow the channel integration instructions
For example, you will integrate Whatsapp page according to the following instructions: WHATSAPP INSTRUCTION DOCUMENT.
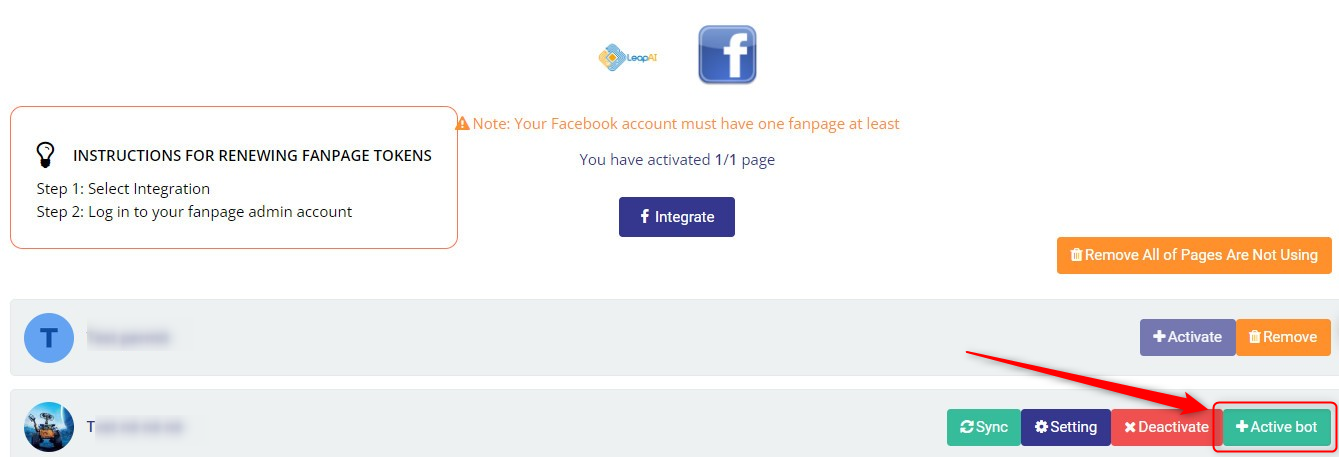
After the steps to activate the pages successfully, it is necessary to activate the bot in turn on the pages that want to use the bot.
Go to Omni channel integration, click “Active Bot” for the page that you want Leap BOT automated reply message.
Flow
Enter LeapAI Onboarding page and log in
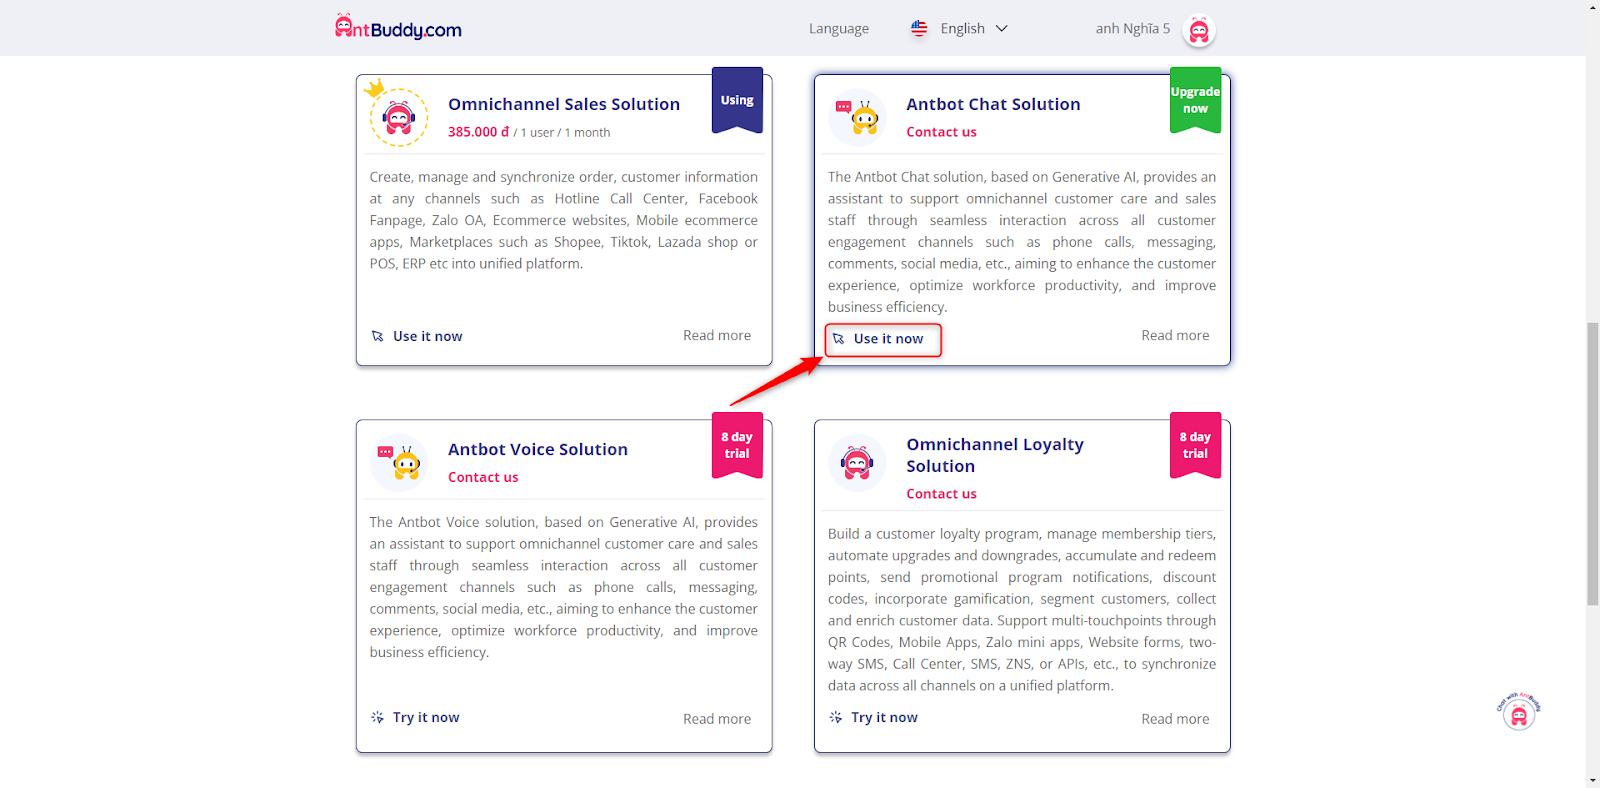
Access the link https://https://bot.leapai.sa/ and press Enter or choosing Antbot Chat to login.
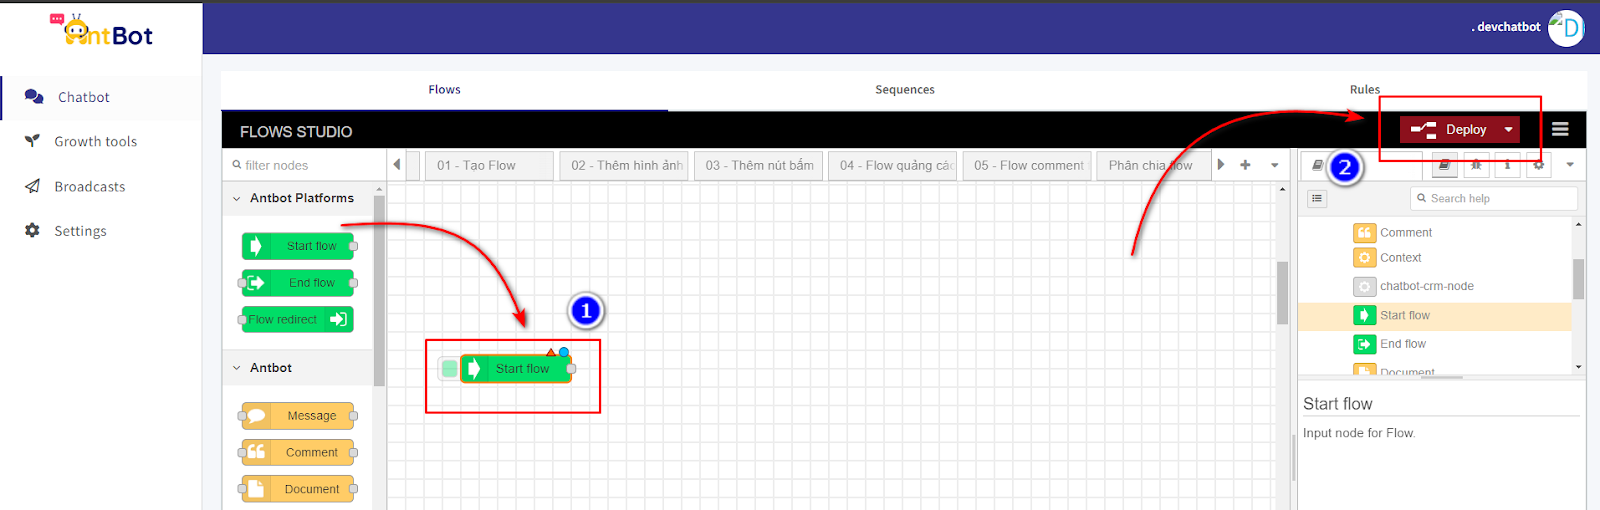
Interface of chatbot
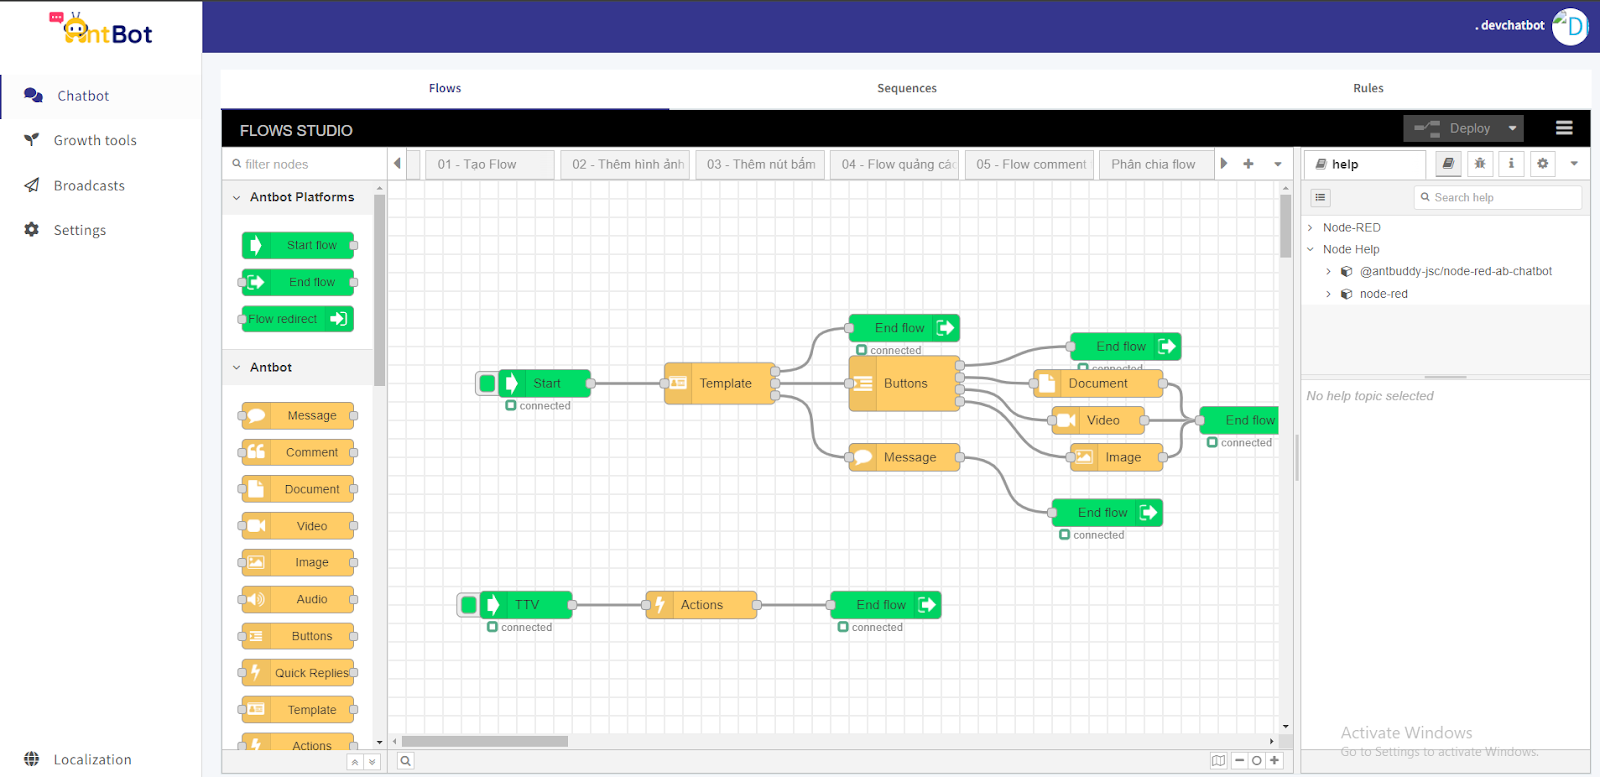
Drag and drop the buttons to use various functions
Antbot Platforms :
Start Flow : Button to start a script flow
End Flow : Button to end a script flow
You can use the Follow redirect button to navigate from one script flow to another
Antbot : Function buttons to respond from the bot with different types of messages
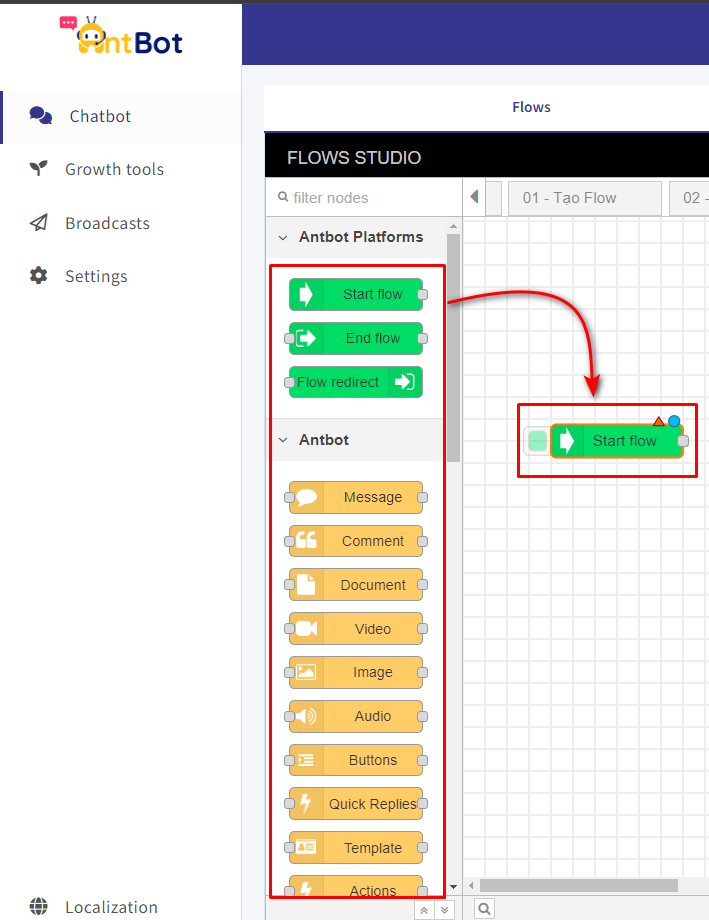
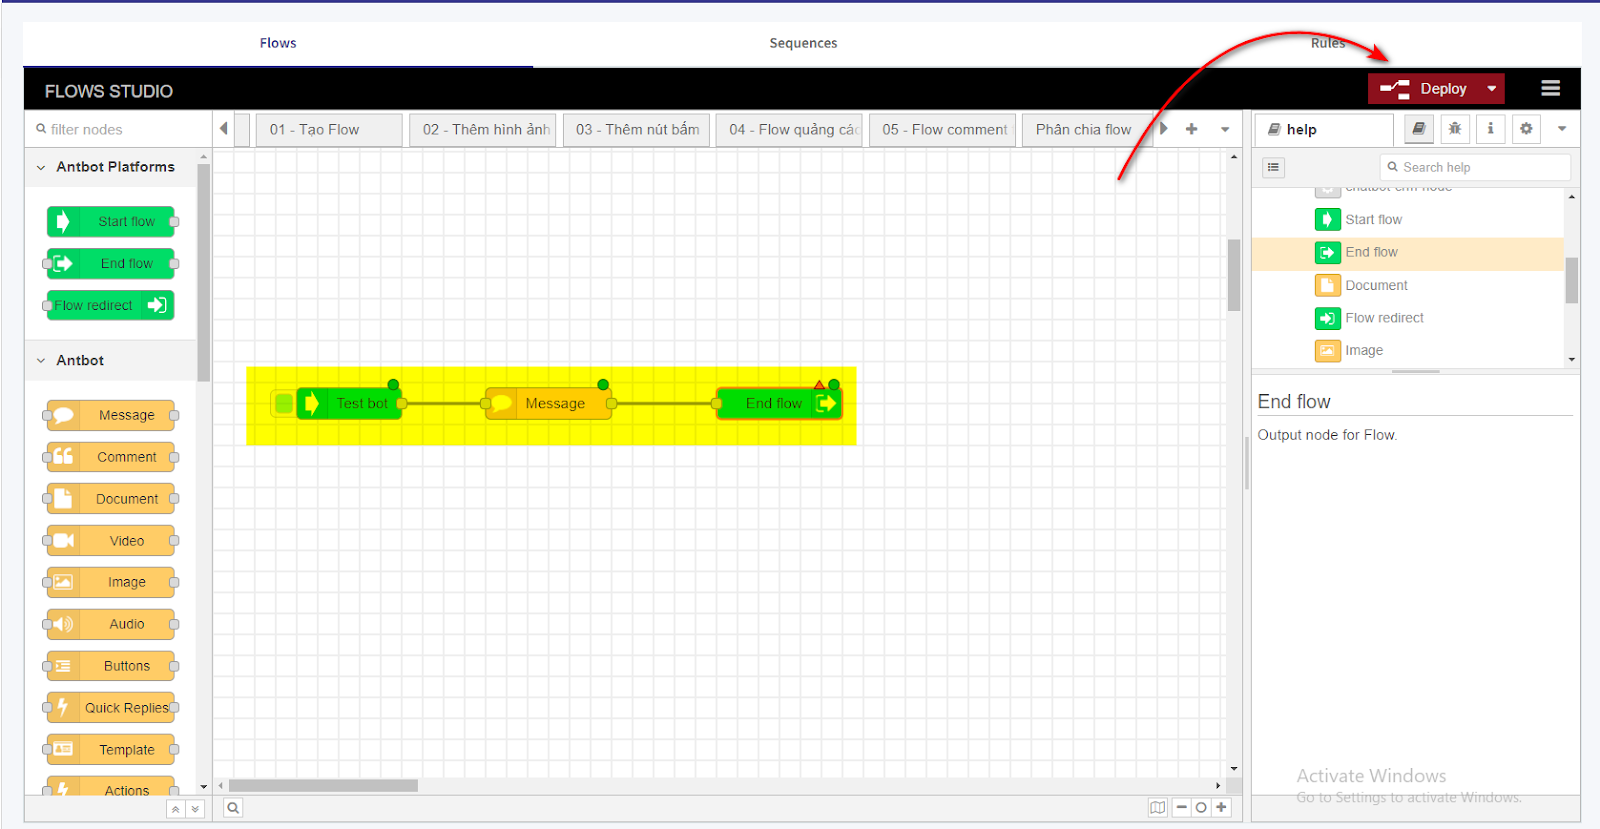
The first time: After dragging the Start flow button over the settings panel, click the Deploy button.
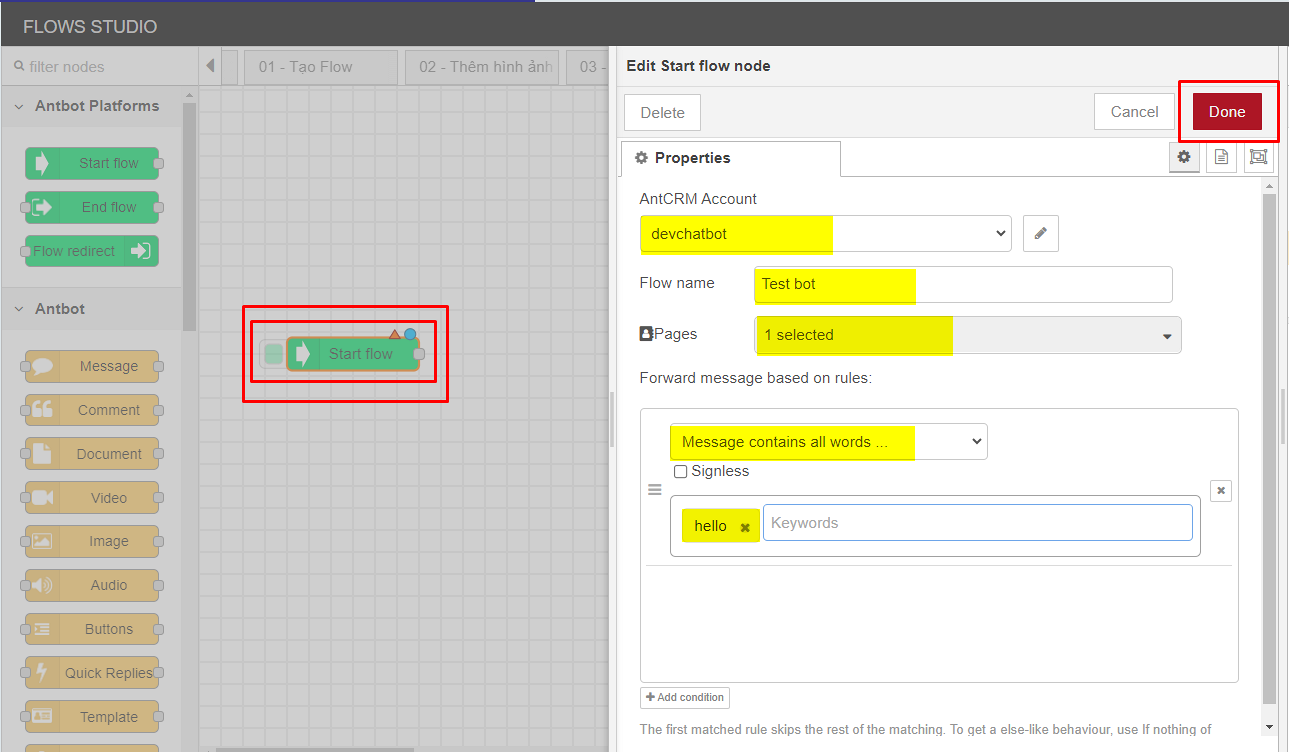
First, in the Start flow button ,double click ,choose and add the necessary information, for example :
- AntCRM Account : Choose AntCRM account
- Flow name : Name of the script flow
- Pages : Choose the page that is integrated on CRM
- Add condition button:
You can select rule by choose conditions about the message when customer text
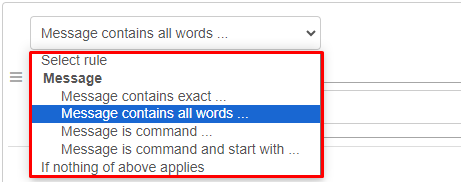
Enter the keyword, then press Enter
=> Press Done to save
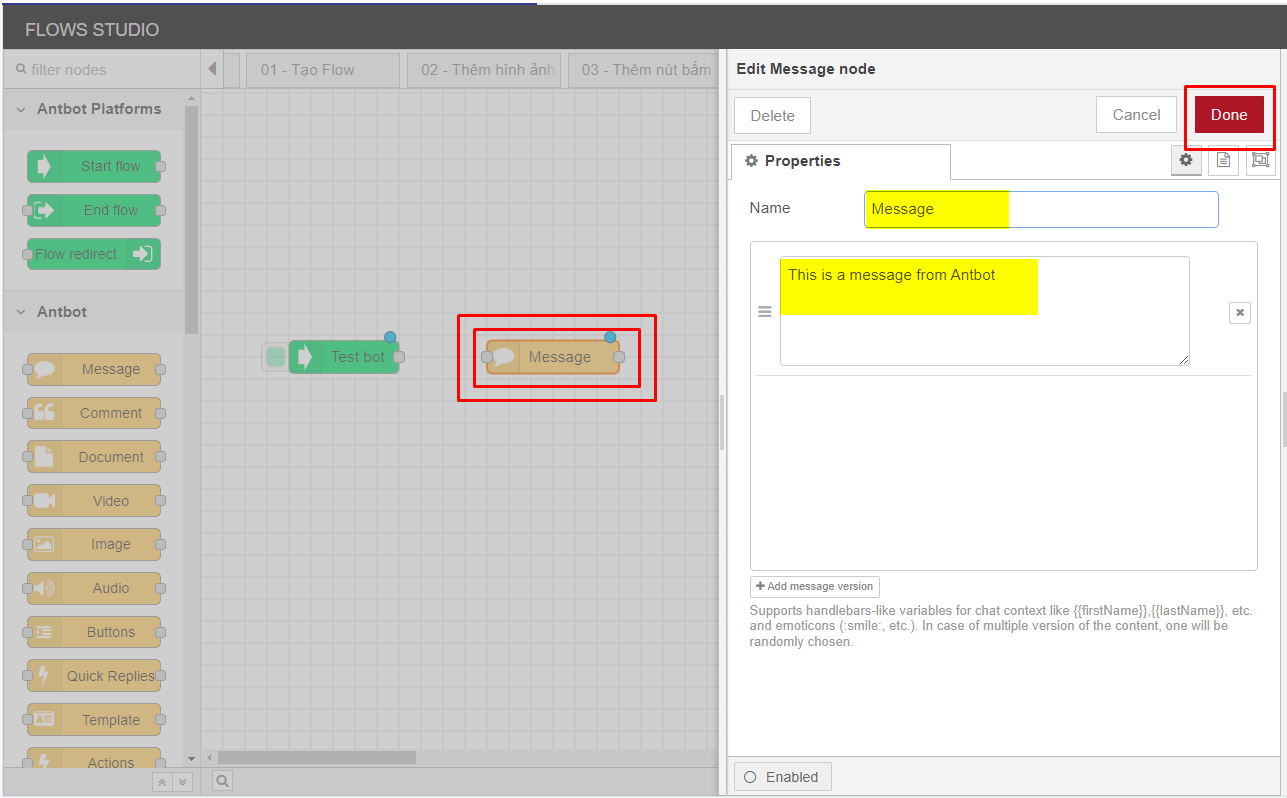
Add Message button (to return a text message), Adding example information:
Name : Name of button (Option)
Message : Enter the message you want to return a message to the customer ( you can enter many messages by pressing Add message version button )
=> Click Done to save
Link and complete flow:
Connect the buttons together with the button ends:


To finish flow, you click on End flow button, then double click and choose AntCRM account, click Done to save
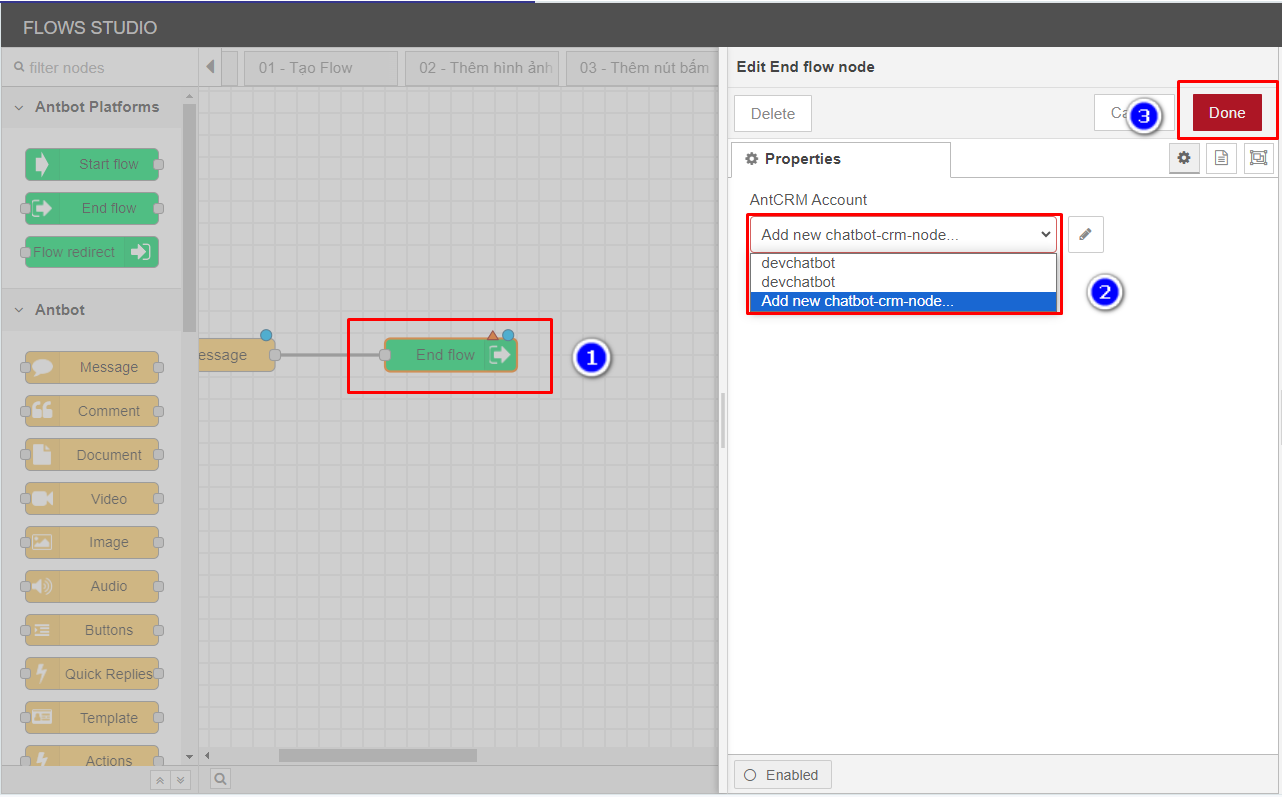
Here's a flow that runs a basic example for the bot to respond automatically. After adjusting, press the Deploy button to save (Multiple buttons can be connected together to create a script that the user desires)
Example results when chatting with bot based on the above script flow

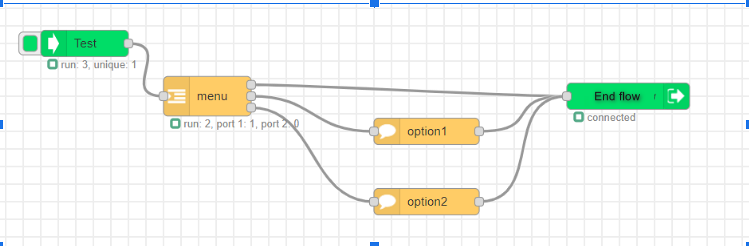
In addition, it is possible to respond to this type of Button message like this :
Example script flow:
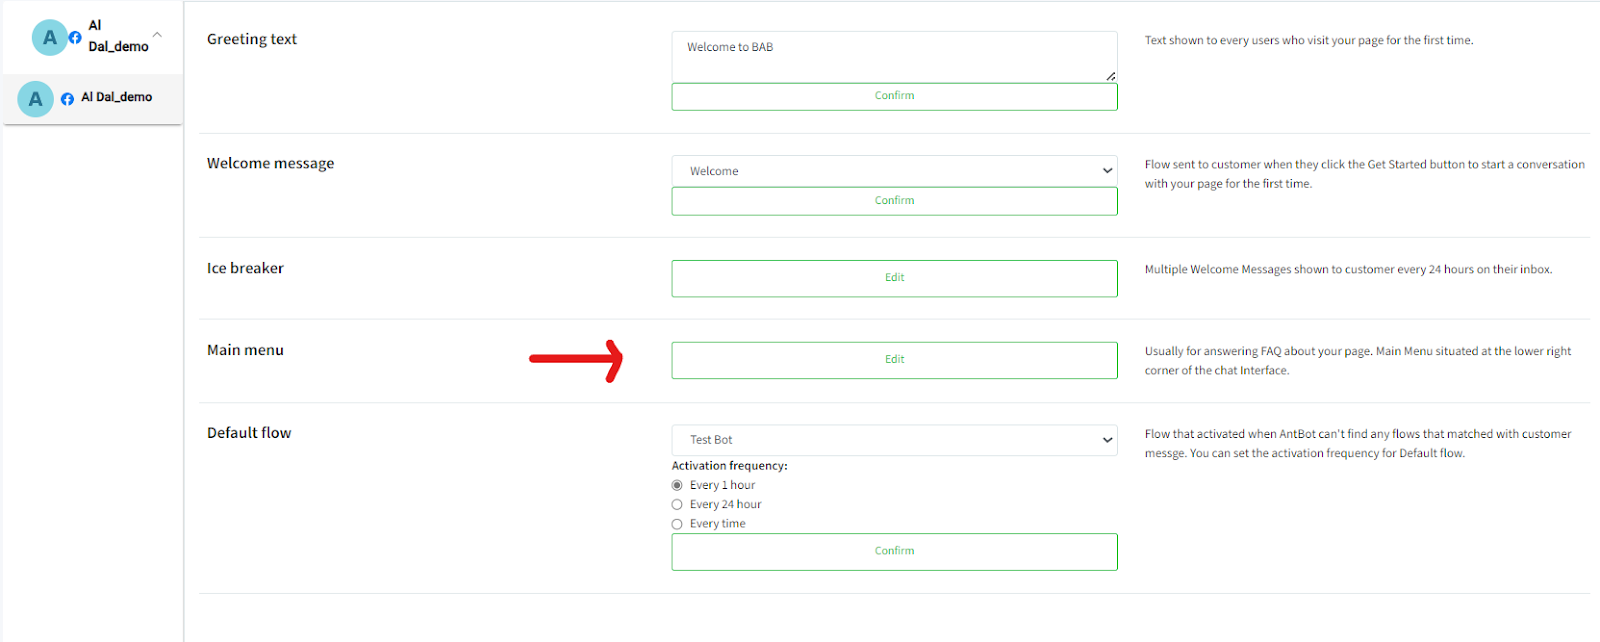
Then we need to setup the Page, go to the section Setting:
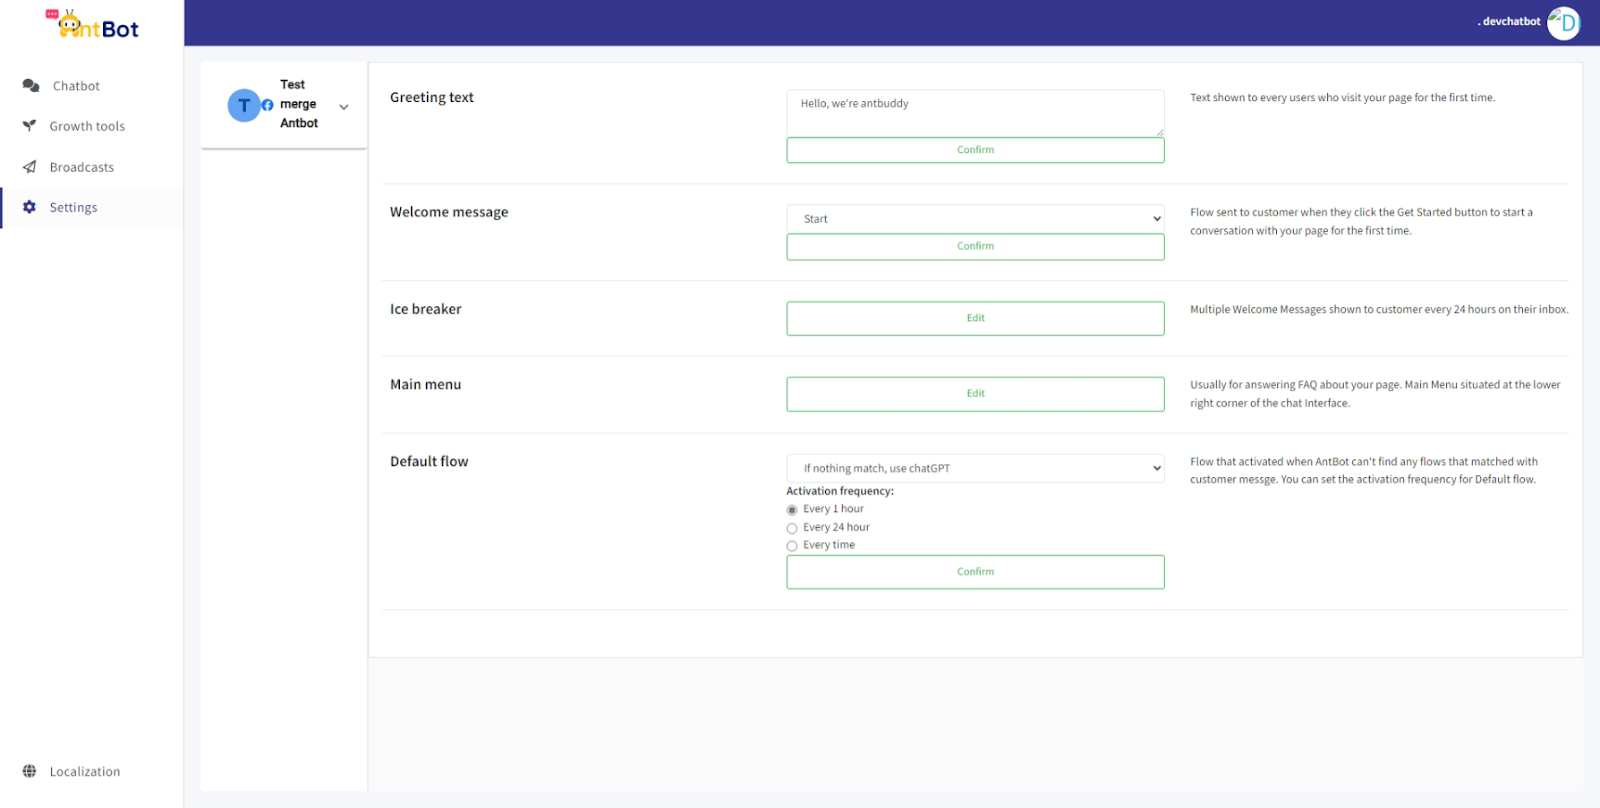
Settings details :
Greeting text : Greetings when new users chat with the Page for the first time
Welcome message : The button is set up when chatting for the first time, and when clicked will start a script stream based on the selected stream
Ice breaker : Re-display Welcome message when no message has been sent for more than 24 hours
Main Menu : to add to Menu for messages with Page
Default flow : Default Flo when not found any suitable script
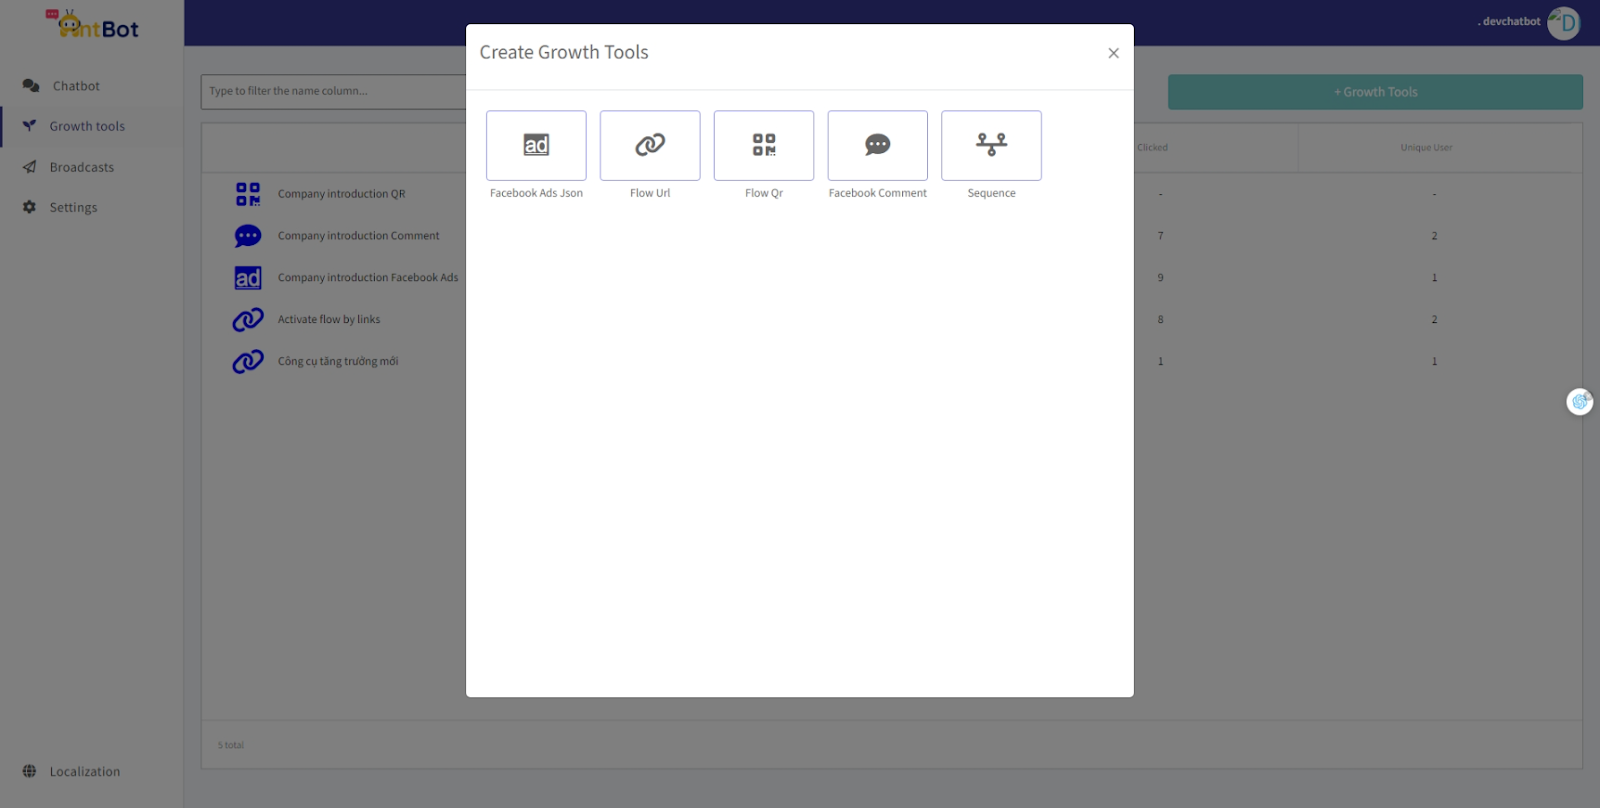
Growth Tool
Create a Url and QR code to automatically navigate to messages with Pages and trigger the script flow set up
Broadcasts
Automatically send the chosen script flow to all your Page's followers at once

Handoff
The purpose of this guide is to enable/disable chatbots based on flow
You can view instruction video. Link : https://drive.google.com/file/d/1KJfWni-NcWywaC4JmrHfEwA7jf4Lzi68/view?usp=sharing
Based on how to create a script flow for the steps above, create a script flow using the Actions button ( )

Double click Actions button
Click on Add action button
In Select Action Type, choose Hand over
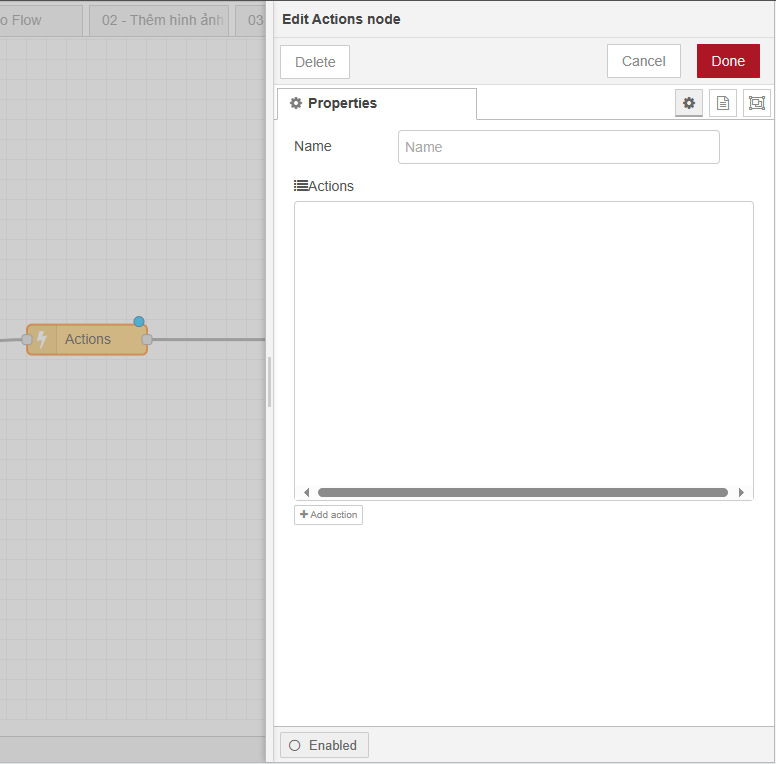
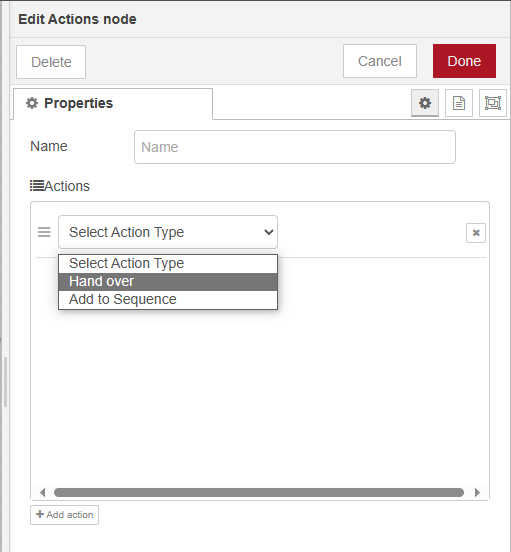
Click on Done button and click to save
If you want to add it to Menu, click on Settings
First, there must be a Start button on Facebook, choose flow in Welcome message (Choose any flow as you want)
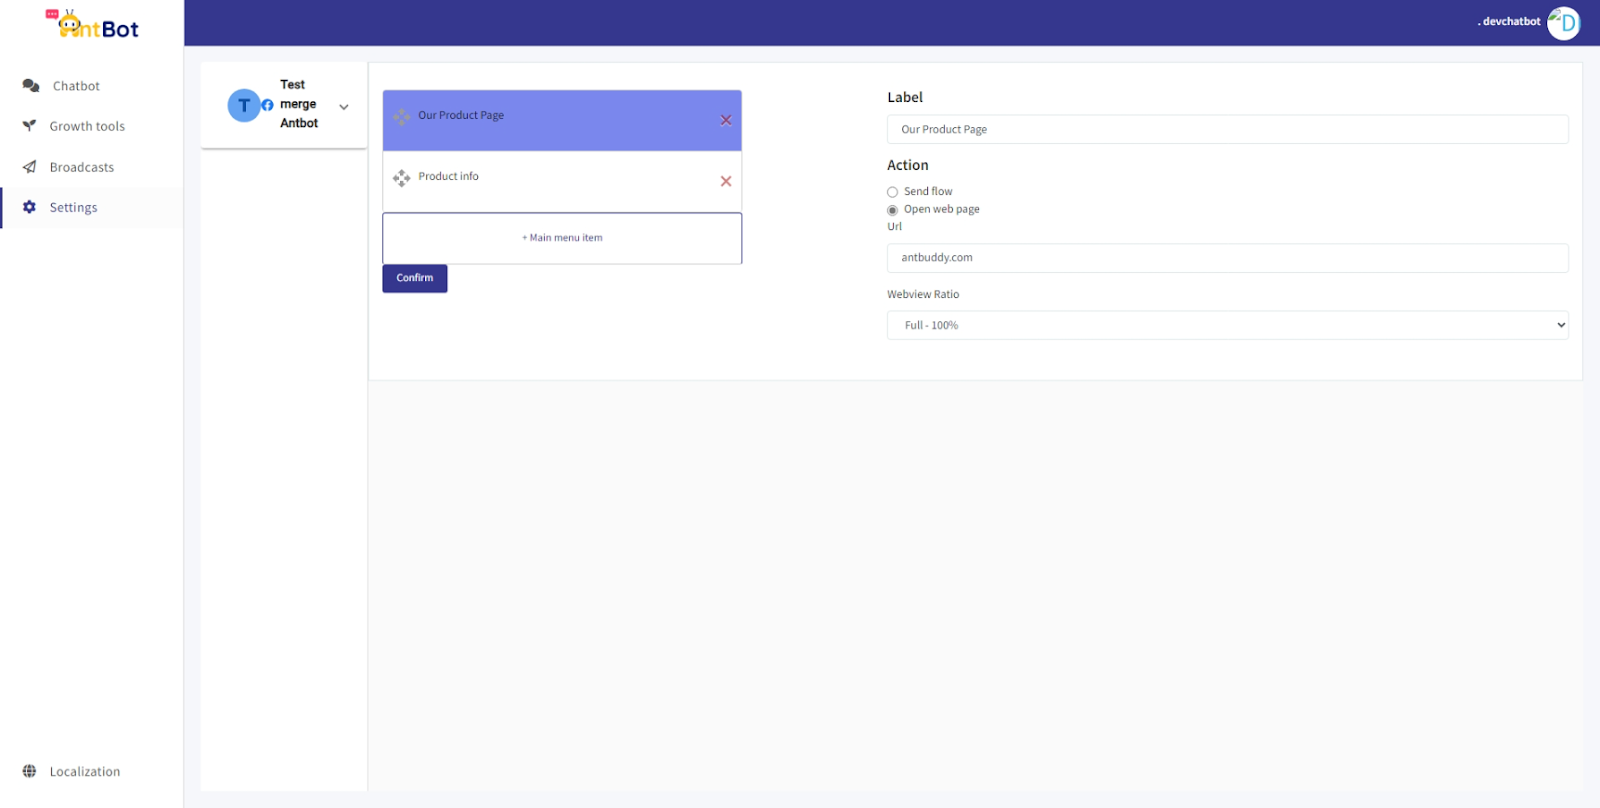
Click on Edit button in Main Menu (Please choose Pages before installing)
Click on + Main menu item
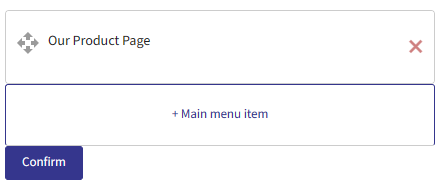
Click on Menu that just created, fill in Label to add the title for button, tick Send flow and choose flow that just created in step 1-5

Click on Confirm button to save
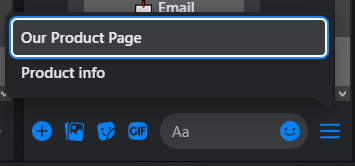
Go to the facebook Page and check, the result will be like this:
Flow Upload Document
The purpose of this tutorial is to train the bot using documents
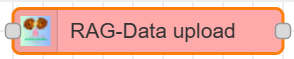
Step 1: Drag & Drop button “RAG-Data upload” into the flow:
Step 2: Click on “Deploy” button:
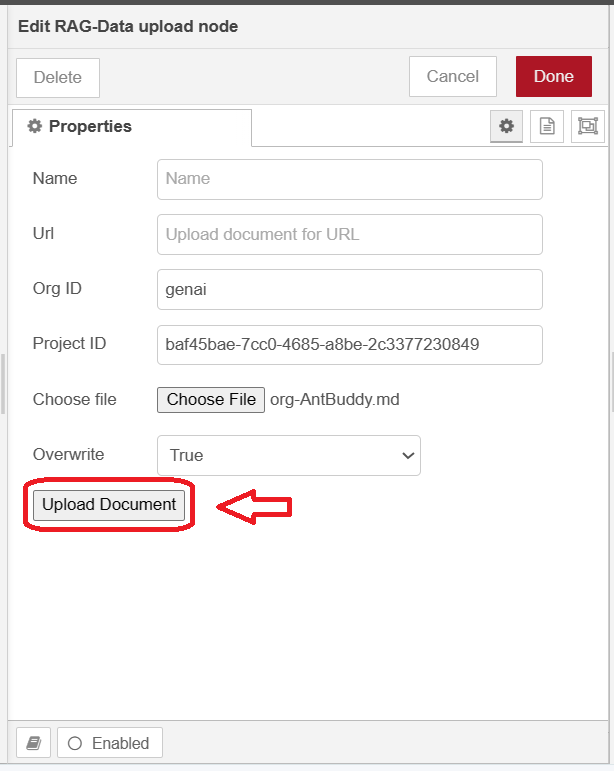
Step 3: Double click “RAG-Data upload” button:
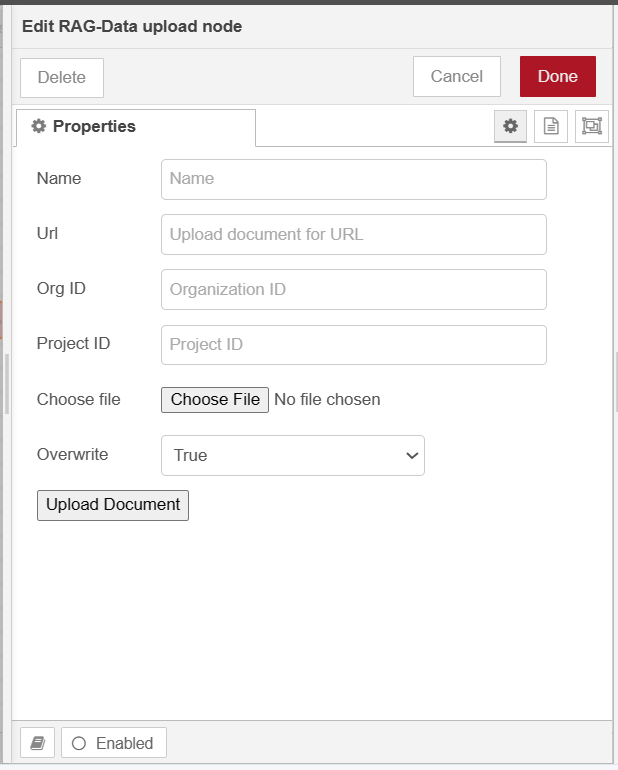
Step 4: After filling in all the information, click the Upload Document button.
Step 5: Now, your bot has been successfully trained
Flow GenAI
The purpose of this guide is to send messages to Genai
Step 1: Drag & Drop button “GenAI” into the flow:
Step 2: Set up simple flow for using GenAI to reply to messages:

Step 3: Click on “Deploy” button:
Step 5: Now, you can now use GenAI to reply to messages.