- Languages
- English
- Popular FAQ
-
Antbuddy Privacy / Date: 17/07/2017 3:12PM View count: 122338
-
Hướng dẫn cài đặt và sử dụng Zoiper trên iOS và Android / Date: 28/12/2018 4:28PM View count: 16296
-
Hướng dẫn cài đặt và sử dụng Grandstream wave trên iOS và Android (Antbuddy) / Date: 28/12/2018 4:26PM View count: 12347
-
Ticket là gì ? Sử dụng như thế nào? / Date: 08/09/2020 9:46AM View count: 11210
-
Hướng dẫn sử dụng chiến dịch BeeIQ Telesales (dành cho quản trị viên) / Date: 08/09/2017 10:24AM View count: 7853
-
Các thao tác chính trong BeeIQ CRM / Date: 08/09/2017 10:36AM View count: 7199
-
Hướng dẫn sử dụng Hệ thống Ticketing trên BeeIQ CRM / Date: 08/09/2017 10:37AM View count: 7039
-
Hướng dẫn cấu hình Email Forwarding BeeIQ CRM / Date: 08/09/2017 10:37AM View count: 6407
-
Hướng dẫn sử dụng Kite Chat (dành cho quản trị viên) / Date: 11/07/2017 7:37PM View count: 6391
-
Video hướng dẫn cài đặt và sử dụng Tổng đài Cloud AntBuddy / Date: 13/09/2017 3:39PM View count: 6337
AntCRM - What are Lead, Contact, Account ? How to create Lead, Contact, Account?
AntCRM - What are Lead, Contact, Account? How to create Lead, Contact, Account?
1. What is Lead? What are Contact, Account?
Leads - also known as Potential Customers, are people who are in need of the product or service you provide, but have never purchased your product (service). Maybe they are using a competitor's product or service, maybe they don't know about your product (service), or maybe your product (service) hasn't really satisfied them yet. ... However, they can become real customers if you have good marketing strategies.
Contact (individual customer), Account (business, company) related to purchasing activities or using services. It is the most precious thing, the deciding factor in the success or failure of each business. That's why businesses are always looking for ways to manage customers, such as::
Information about customers who have previously purchased the product
Classify customer
Potential customer status
Update customer information from advertising campaigns
Chăm sóc khách hàng cũ của doanh nghiệp
AntCRM is the solution to all of the above problems, bringing you a rich and loyal customer base..
2. How to create Lead, Contact, Account?
Lead, Contact, Account can be created by all authorized employees in the company
There are many different ways to create customers. Currently the system supports 5 ways to create Lead, Contact, Account:
Create manually: Enter the detailed information of Lead, Contact, Account manually on the interface of the Leads, Contacts, Accounts creation page
Import: Import from data file (supports Excel or CSV files)
Webforms: Automatically create Lead, Contact, Account for information, requests, questions left on the website (kite chat / kite call)
Email: Automatically create Lead, Contact, Account for emails pushed to email forwarder
Create quickly: Lead, Contact, Account are created from a quick create form with basic information
2.1. Create manually:
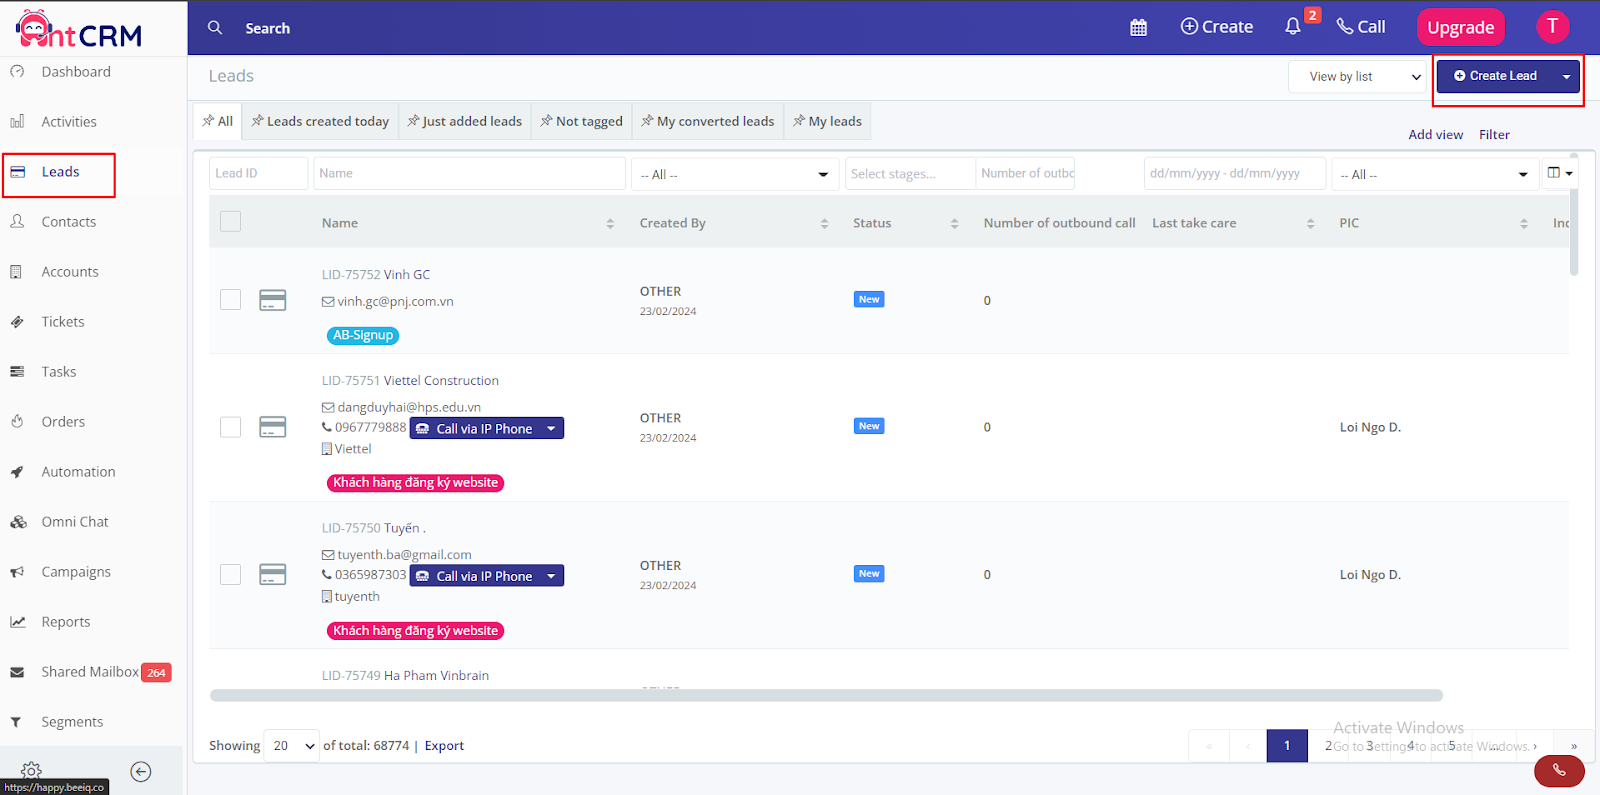
a) Create leads manually:
Step 1. At Menu bar → choose Leads → click button Create lead
The page goes to the Lead creation page
Step 2: Enter the necessary information of Lead
There are the following information fields:

Step 3: Press Save.
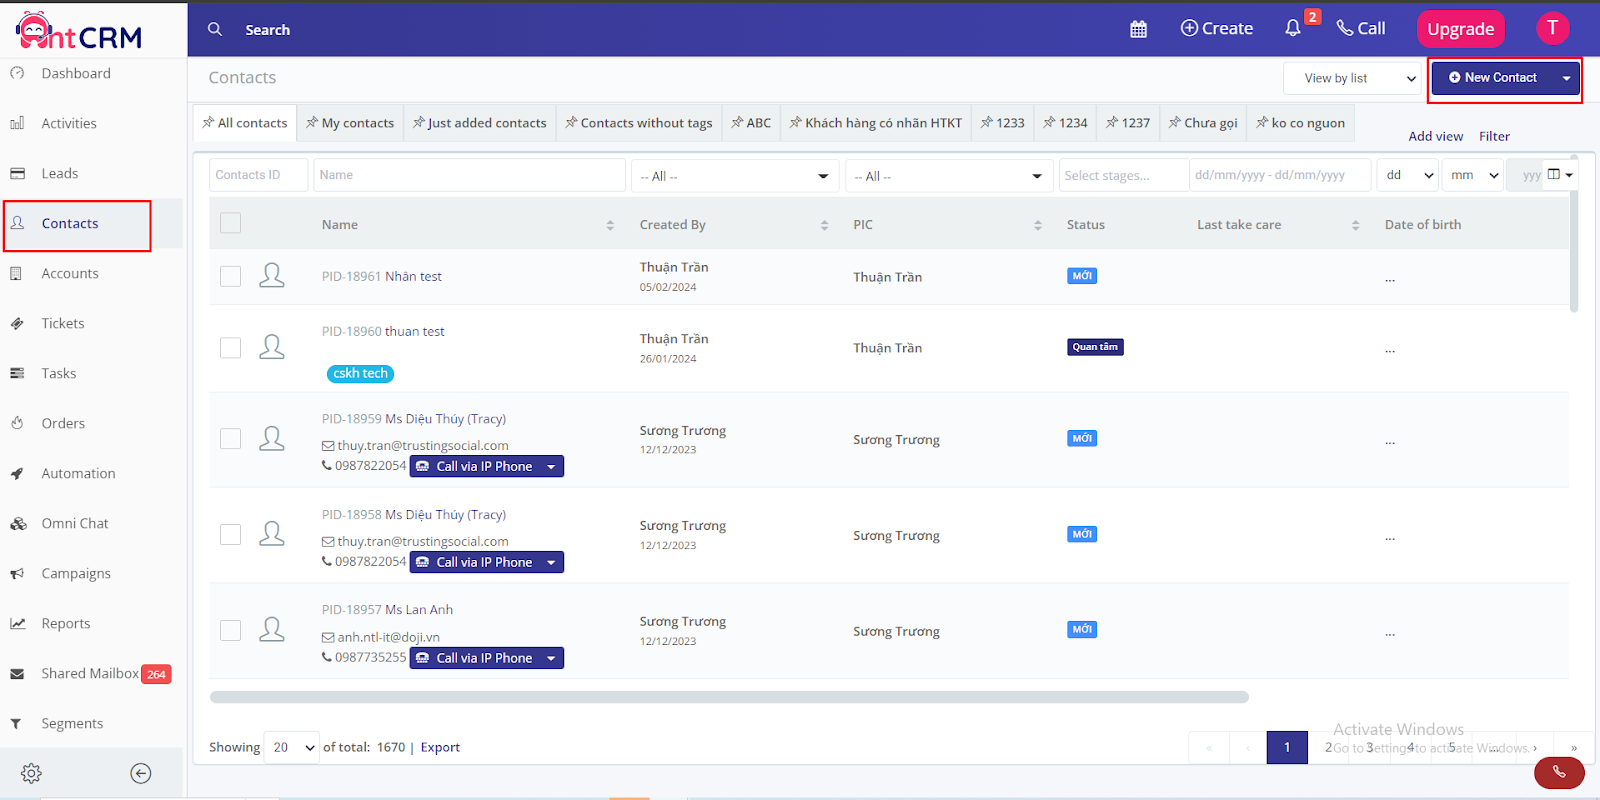
b) Create contacts manually:
Step 1. At Menu bar → choose Contacts→ click button New contact
The page goes to the Contact creation page
Step 2: Enter the necessary information of Contact
There are the following information fields:
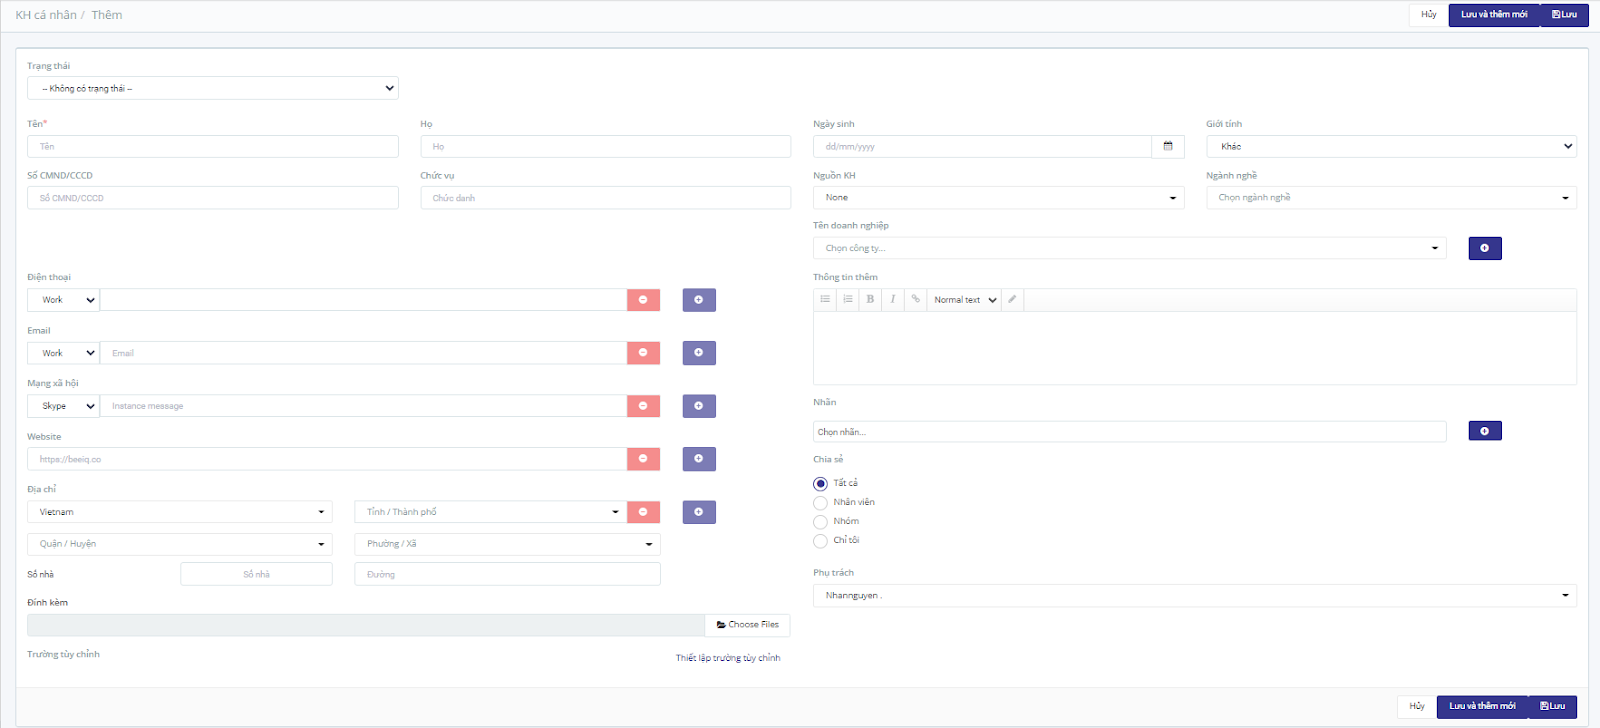
Step 3: Press Save.
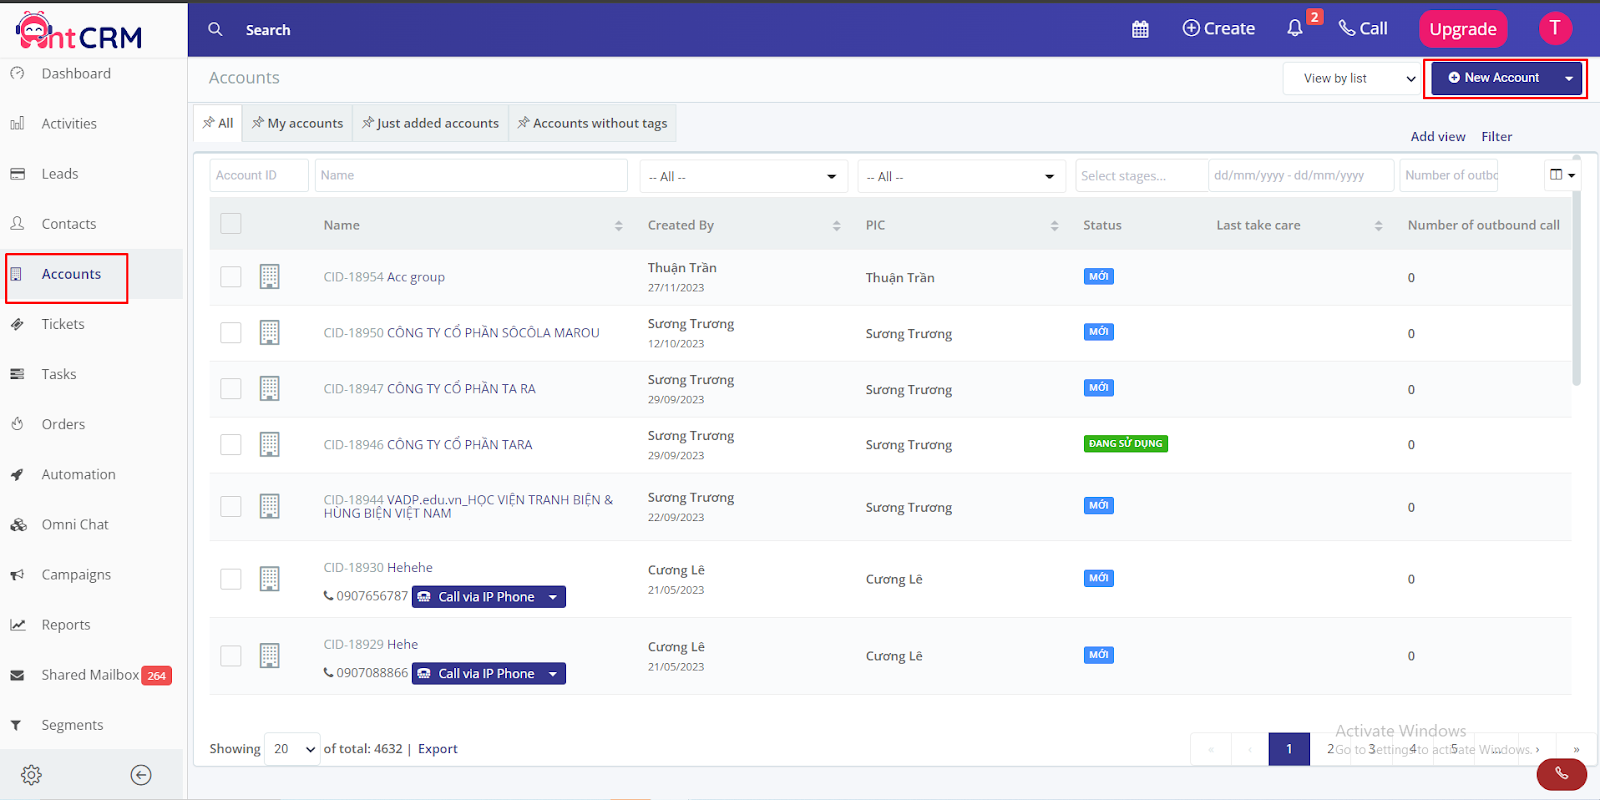
b) Create Accounts manually:
Step 1. At Menu bar → choose Accounts→ click button New account
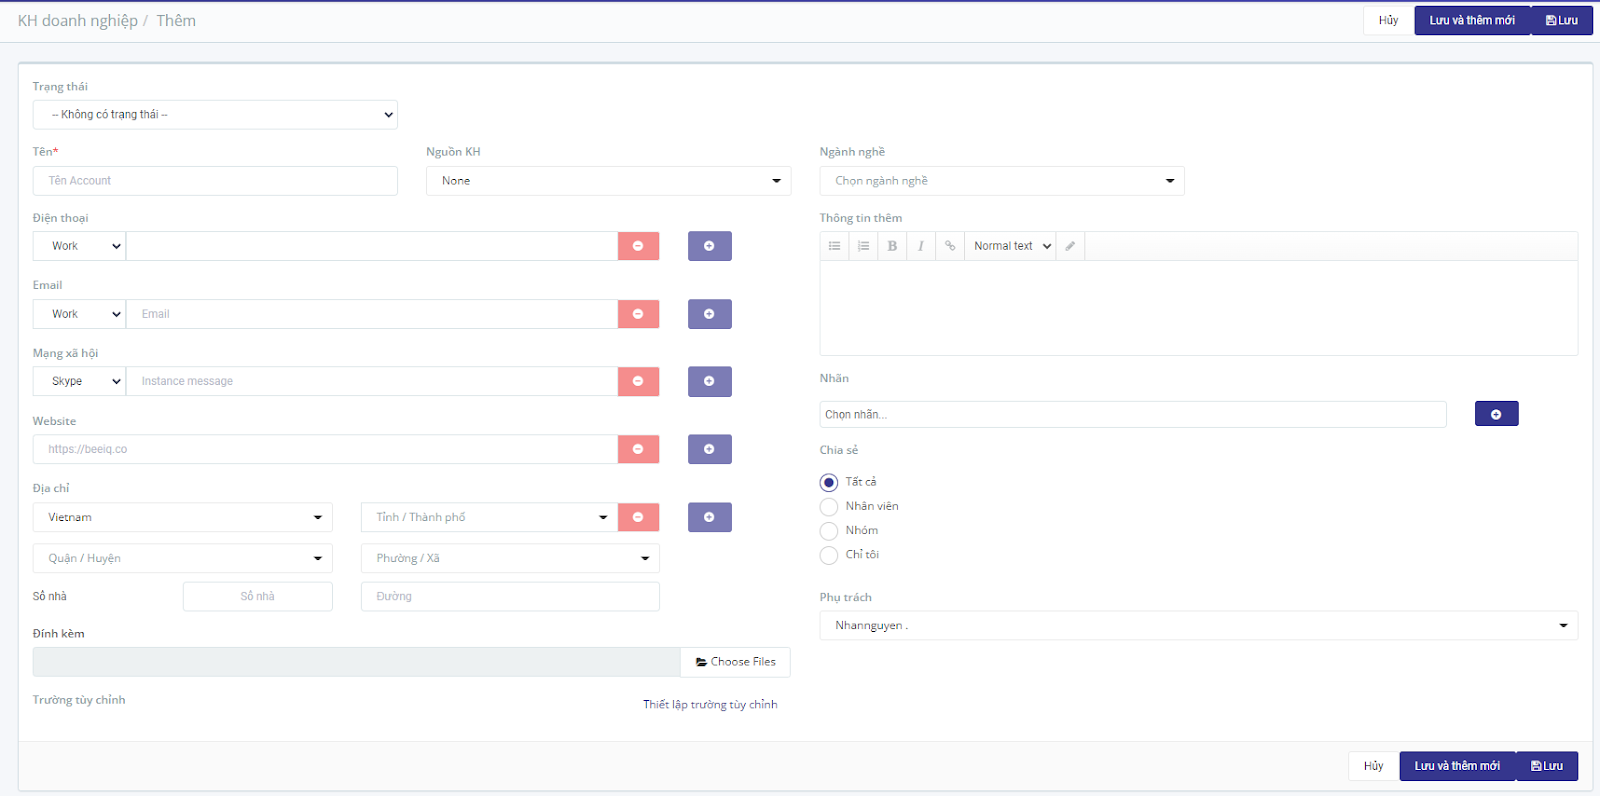
The page goes to the Account creation page
Step 3. Enter Account name (required) and the necessary information
The information of Account is also similar to the information of contact, there are only a few differences like: No date of birth, gender, ID card number, position, account.
Step 4. Press Save to complete creating a new account
2.2. Import Lead, Contact, Account
Import Lead, Contact, Account is a method of uploading an existing customer list in an excel file, saving a lot of time and effort compared to manually adding it. AntCRM supports uploading up to 10,000 customers in 1 import.
Steps to import customer files into AntCRM:
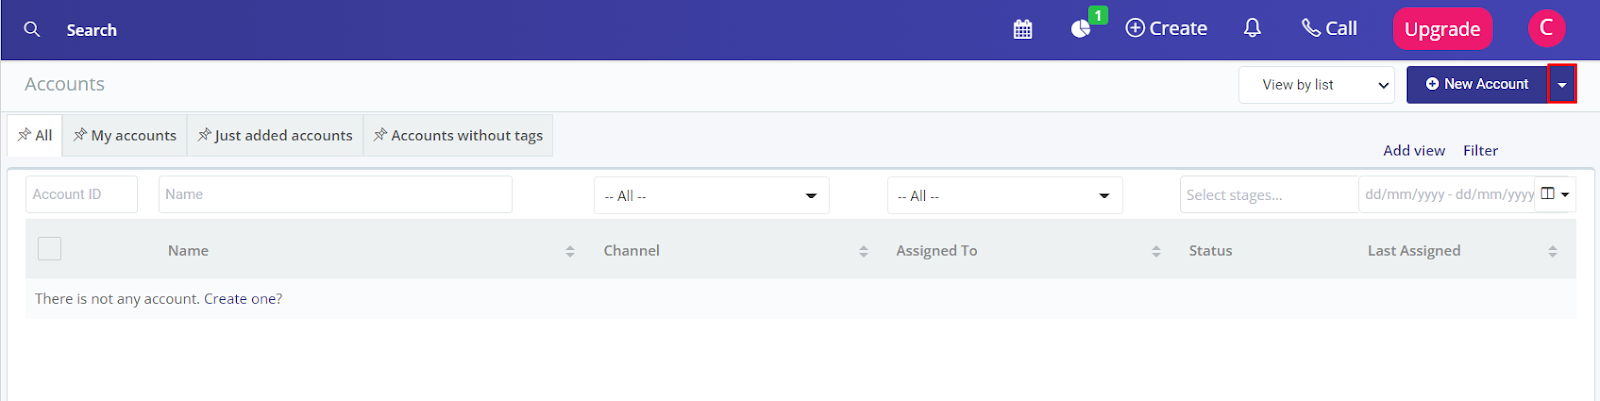
Step 1. At Contacts page, Click on the arrow next to the button Create Contact
(For Lead, do it on Leads page, press button beside Create Lead button)
(For Lead, do it on Accounts page, press button beside Tạo Account)
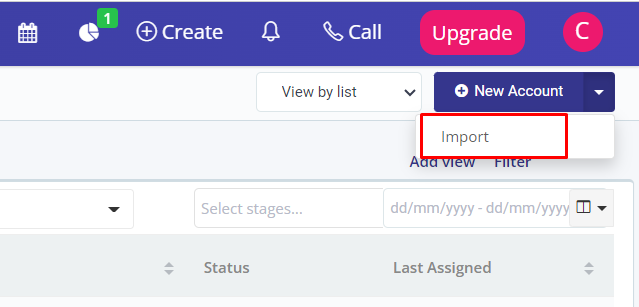
Step 2. Press Import button
The page goes to the first step of importing customer lists
Step 3. At the Download Template Step, click the Download button to download the import template
Note: Please follow our template to ensure information is uploaded correctly.
Prepare the file accurately and clearly according to the form.
Press Continue to go to Upload step
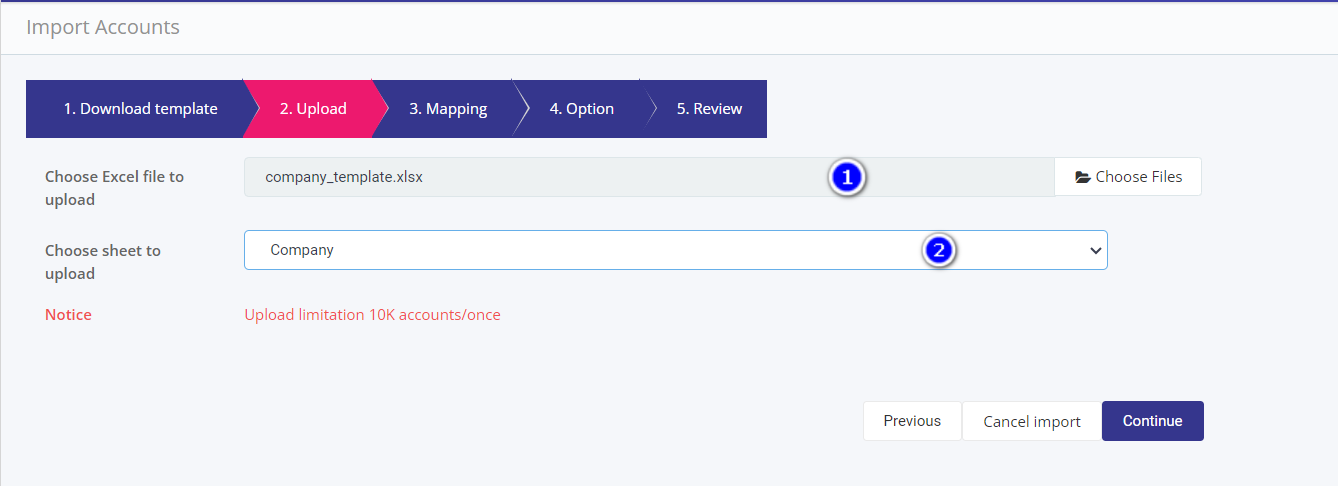
Step 4. Press Choose Files button, choose the prepared customer list file, choose the sheet containing the customer list
Click Continue to go to Mapping step
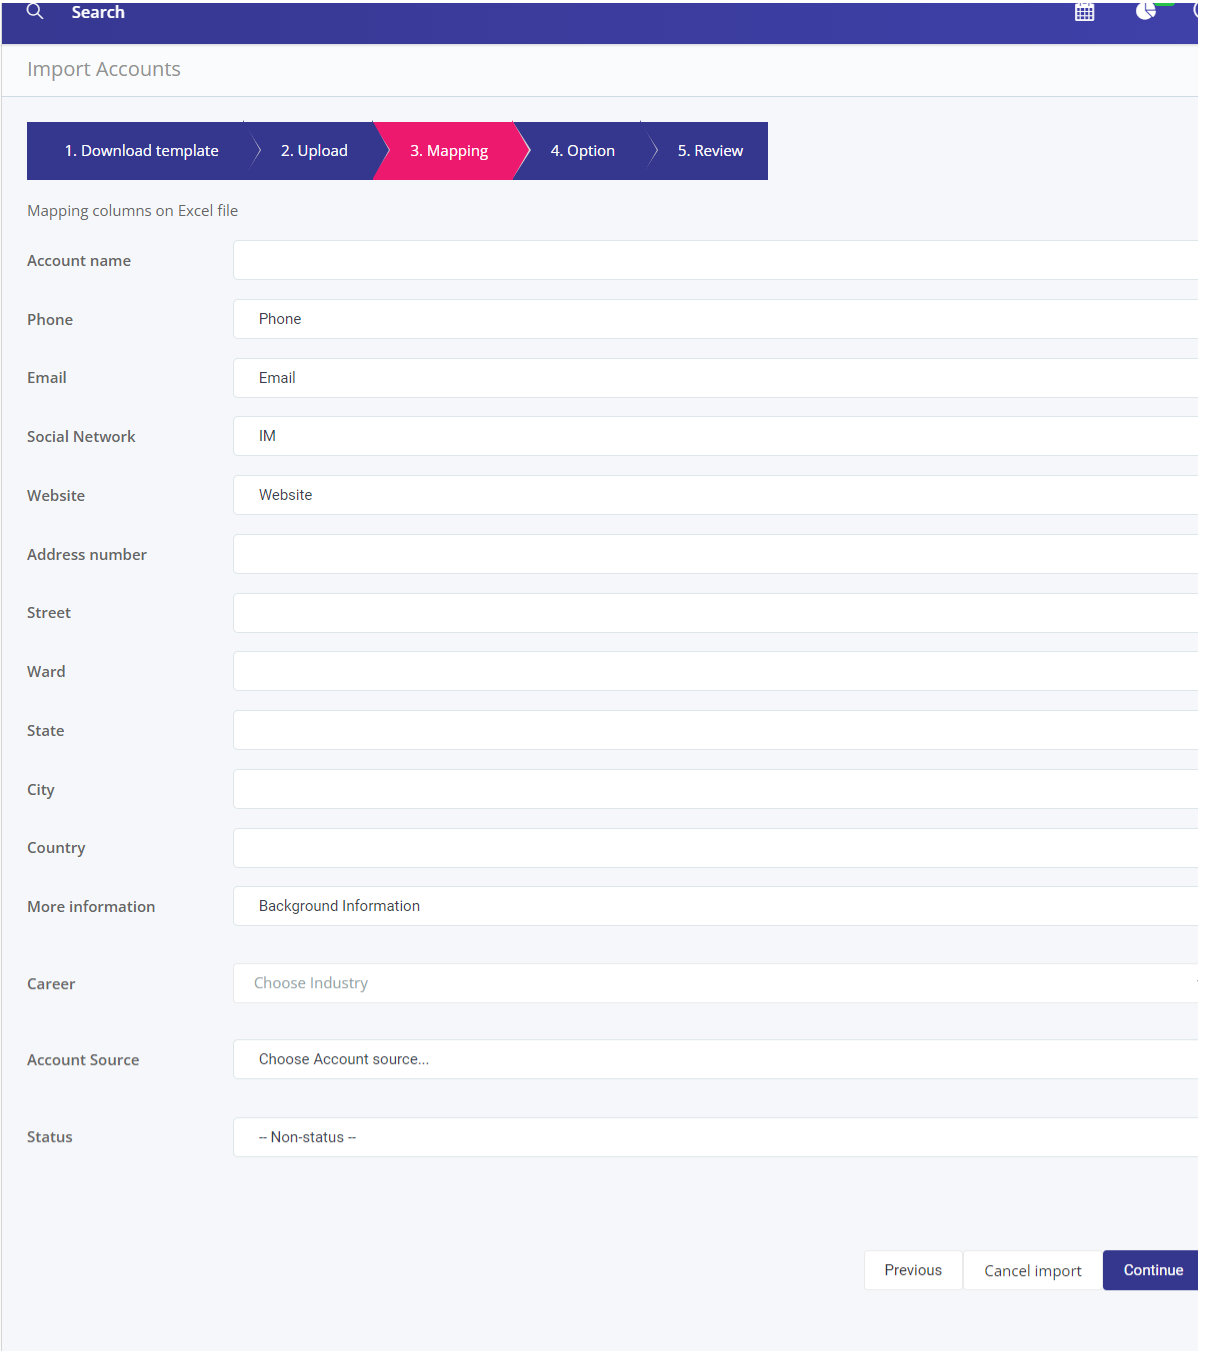
Step 5. Choose the columns with the corresponding information. Click Continue
Step 6: At Option step, There are 4 settings for data uploaded to CRM::

Click on Continue to go to Review step
Step 6. At Review step, Please check all information in the customer list file to upload:
Check if the file name is correct or not
Check if the Sheet Name is the correct sheet to upload
Check Number of Contacts in the file
Check Set up how to import when there is a duplicate phone number or email
Check tag
Check the list of customers in the details table
In addition to the above checking steps, the system will automatically check and warn you of the following errors:
The uploaded list has duplicate information in the file, which means there are 2 or more customers in the list file with duplicate emails or phone numbers.
The uploaded list contains customers with invalid phone numbers or emails
The uploaded list has unnamed customers
If the file has one of the errors above, please edit the file and import again.
If there are no problems with the file, you press Continue button to upload to CRM.
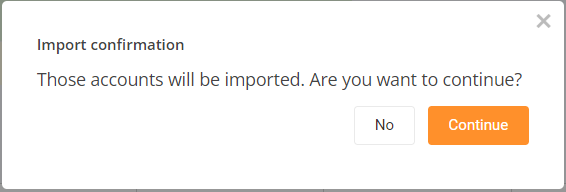
Step 7. Press Continue button in the import confirmation popup.
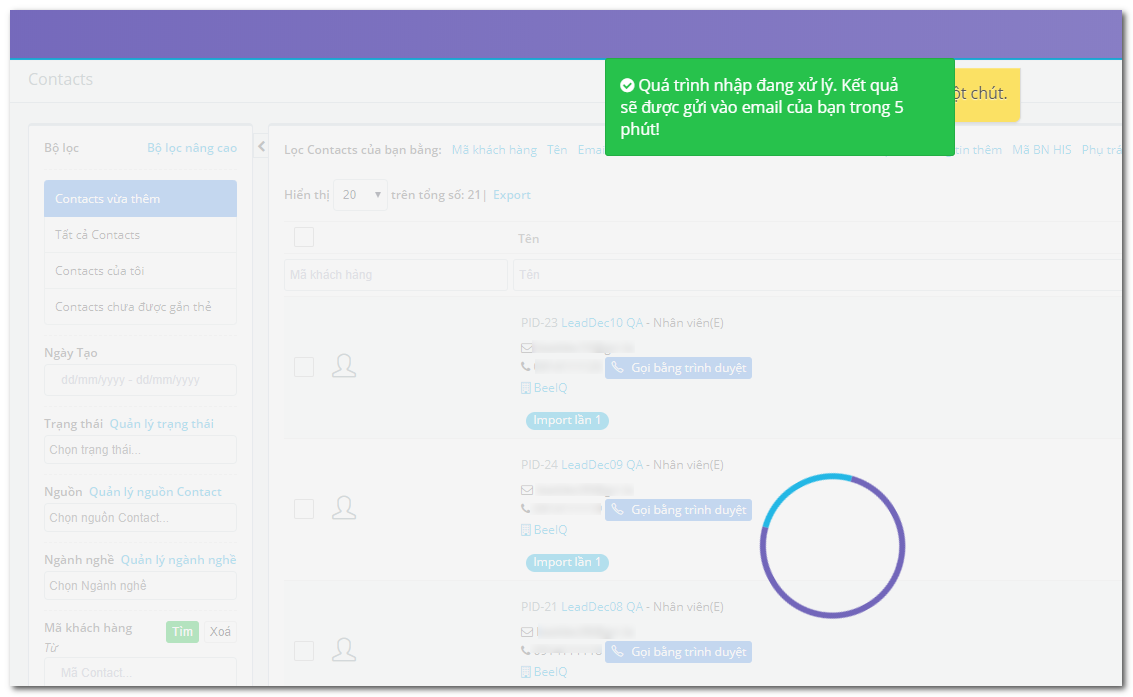
The system will notify that the list is being uploaded. The longest time to download is 5 minutes. In fact, if the number of customers is small, the list will finish uploading immediately..
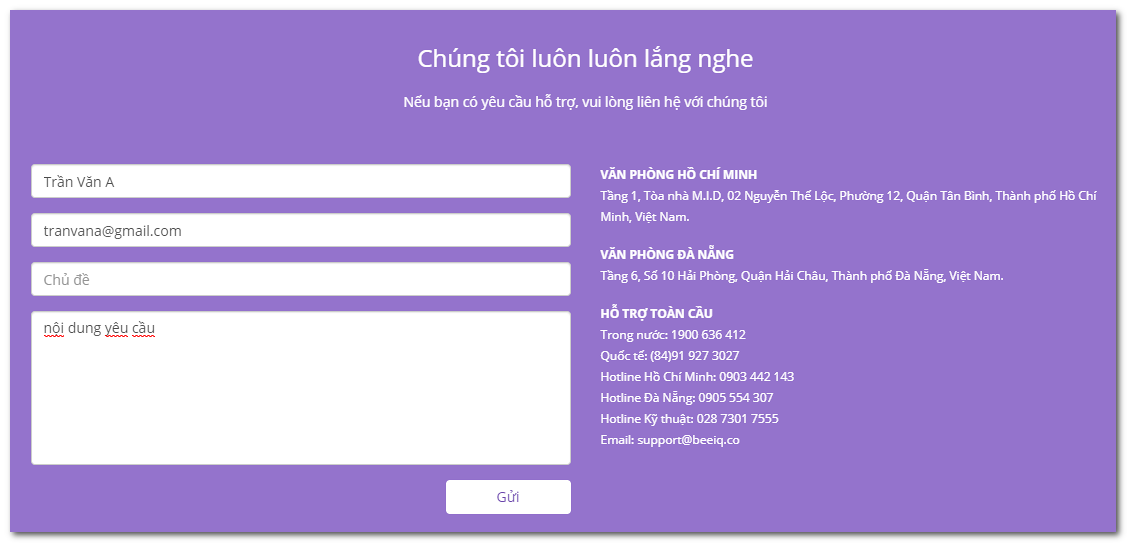
2.3. Automatically create customers from Webforms:
Businesses that have their own website can contact us (tech@antbuddy.com) or hotline (1900 636 412) to set up a customer registration form, customer information will be automatically saved to AntCRM system.
This form will bring a large number of potential customers to your company, which will then use this information to run product promotion campaigns.
For example, the form below:
2.4. Automatically create customers from Email Forwarder:
Your company has set up an Email forwarder. Every time a customer sends an email to the system, the system will create a new corresponding customer..
Ex:
Your company's support email is Doanhnghiep@xyz.com, with forward settings to AntCRM system (see how to set up forwarder here)
Customers have email khachhanga@gmail.com, with email registration name KhachHang A, and send an email to your company's support email (doanhnghiep@xyz.com).
The system will automatically create a new customer named KhachHang A and email is khachhanga@gmail.com.

2.5. Create customer quickly:
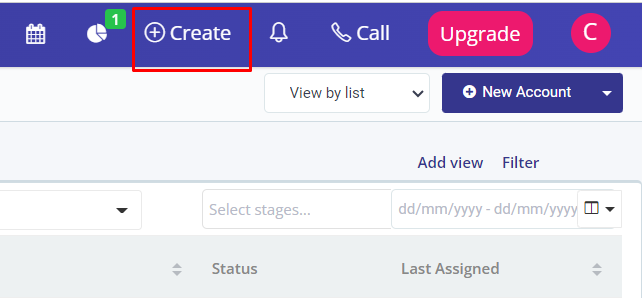
Case 1. Press (+) Create button at the top of the page:
This is a quick step to create Lead or Contact or Account, you can create customers no matter where you are on any page of AntCRM..
Strep 1. Press (+) Create button at the top of the page
Step 2. Press Create Lead or Create Contact or Create Account depending on your needs
The page goes to the Create Customer page
Step 3. Enter information and press Save the same way as creating manually.
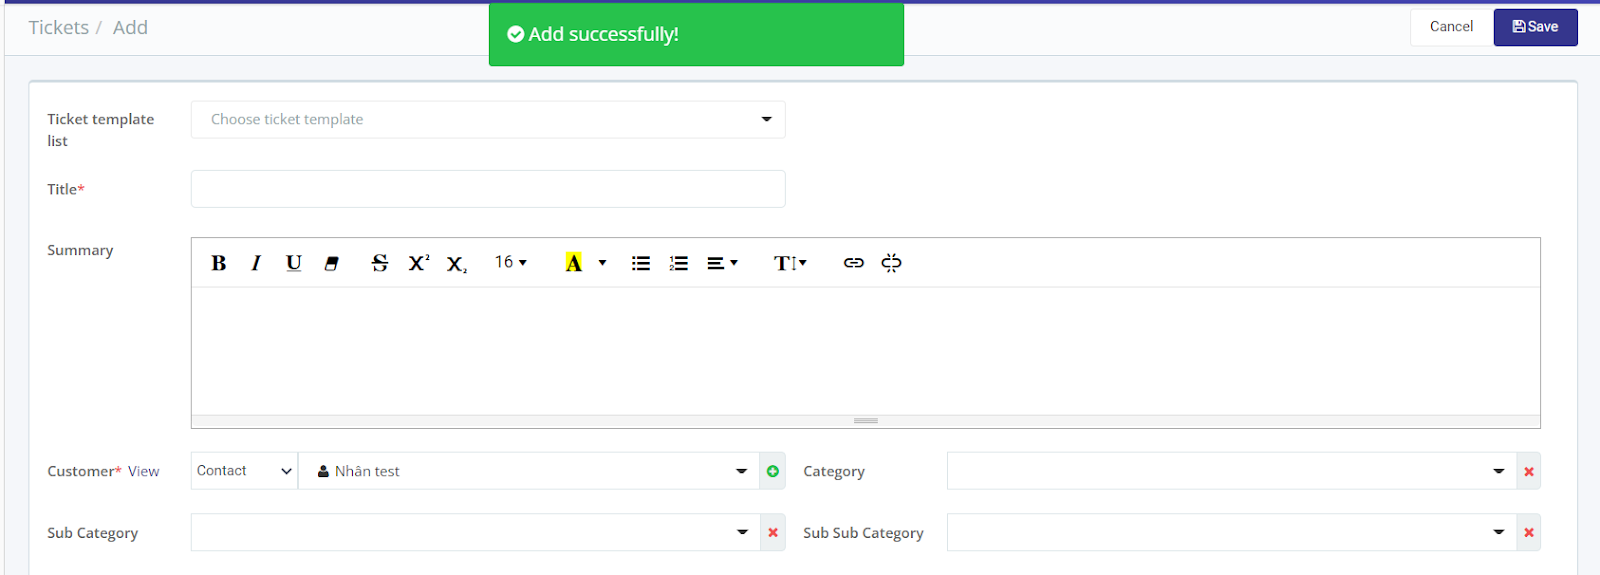
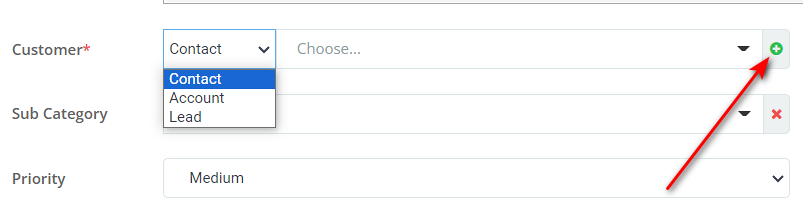
Case 2. Quickly create customers on the Create/Edit Tickets and Tasks pages
Step 1. At Create/Edit Ticket/ Task page, press + button in the customer field
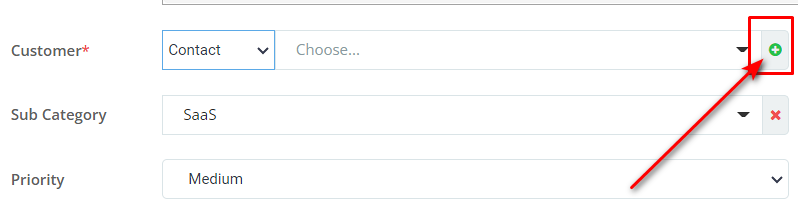
For Account, change the customer type and then press the button + .
The page will pop up a customer quick creation popup
Step 2. Enter the name customer (required) and the necessary information

Step 3. Press Add to create a new customer.