- Languages
- English
- Popular FAQ
-
Antbuddy Privacy / Date: 17/07/2017 3:12PM View count: 122359
-
Hướng dẫn cài đặt và sử dụng Zoiper trên iOS và Android / Date: 28/12/2018 4:28PM View count: 16299
-
Hướng dẫn cài đặt và sử dụng Grandstream wave trên iOS và Android (Antbuddy) / Date: 28/12/2018 4:26PM View count: 12351
-
Ticket là gì ? Sử dụng như thế nào? / Date: 08/09/2020 9:46AM View count: 11216
-
Hướng dẫn sử dụng chiến dịch BeeIQ Telesales (dành cho quản trị viên) / Date: 08/09/2017 10:24AM View count: 7854
-
Các thao tác chính trong BeeIQ CRM / Date: 08/09/2017 10:36AM View count: 7201
-
Hướng dẫn sử dụng Hệ thống Ticketing trên BeeIQ CRM / Date: 08/09/2017 10:37AM View count: 7040
-
Hướng dẫn cấu hình Email Forwarding BeeIQ CRM / Date: 08/09/2017 10:37AM View count: 6409
-
Hướng dẫn sử dụng Kite Chat (dành cho quản trị viên) / Date: 11/07/2017 7:37PM View count: 6394
-
Video hướng dẫn cài đặt và sử dụng Tổng đài Cloud AntBuddy / Date: 13/09/2017 3:39PM View count: 6340
AntCRM - Operations with Ticket
Operations with Ticket
1. Update Ticket:
There are 2 ways to update Ticket
Update Ticket manually
Update Ticket at the Ticket detail page
Note: Employees must be authorized to edit, specifically as follows:
Members granted permission to edit tickets will be able to edit tickets:
Tickets are assigned
Tickets for yourself to create
Admins who are granted permission to edit tickets can edit any ticket.
Owners can edit any tickets
1.1. Update Ticket manually
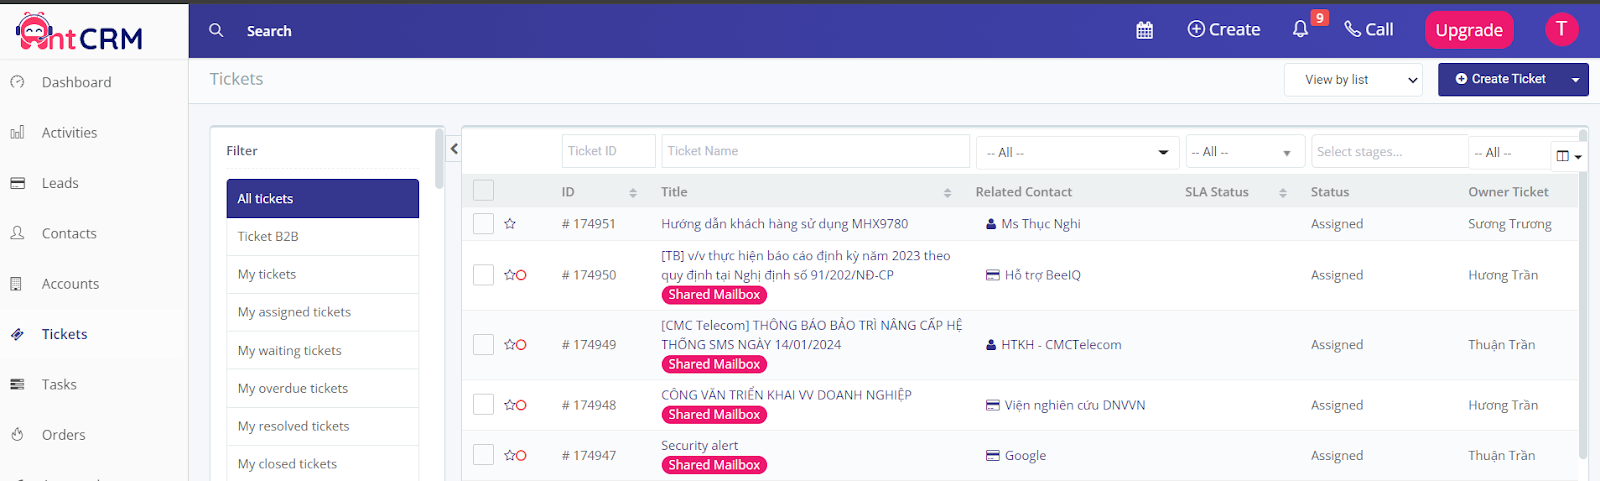
Step 1: Choose Ticket on the Ticket list page to go to the Ticket information page by clicking on the title
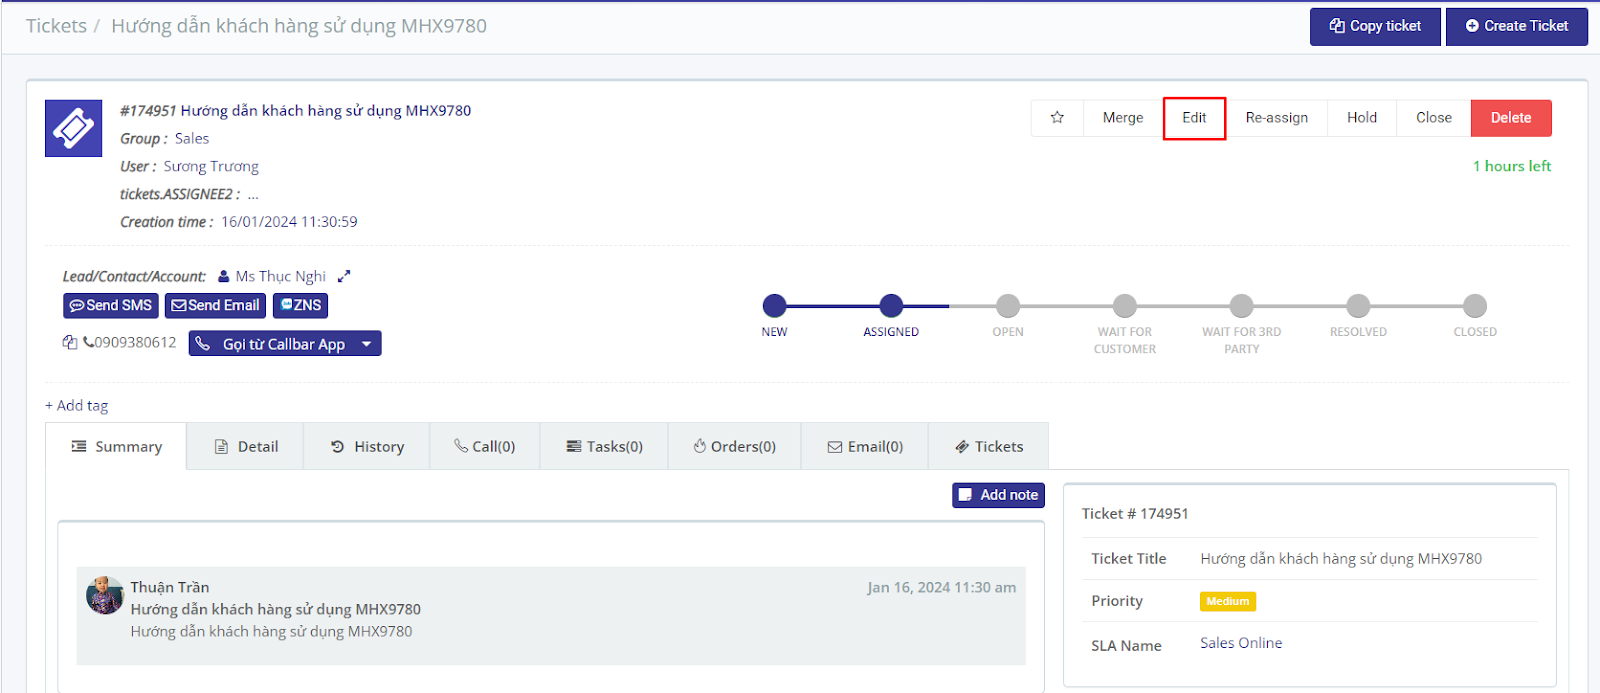
Step 2: Choose Edit button at the right corner of Ticket → update ticket information → choose Save to complete updating ticket
1.2. Update Ticket at the Ticket detail page
Step 1. Open any ticket detail page
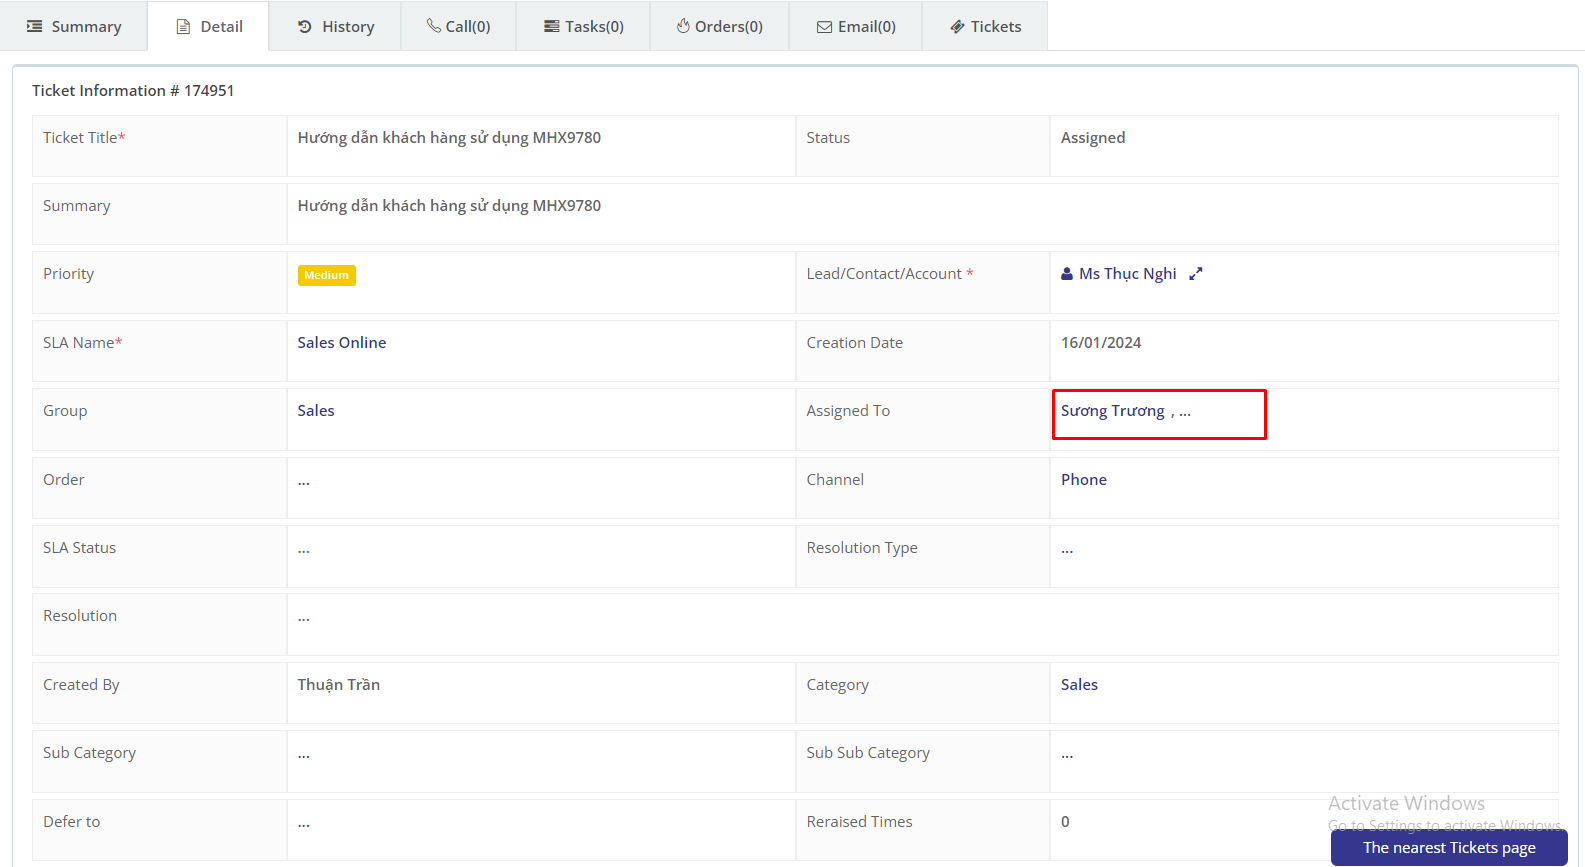
Step 2. Open Detail tab
Step 3. Click on the current value or the 3 dots to open the editing dialog box (see image below)
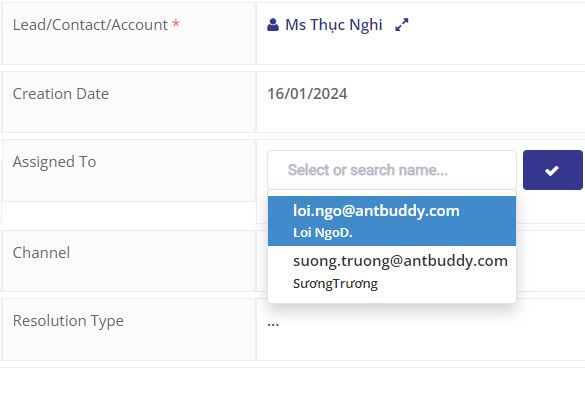
Step 4. Update the desired value and press Save
2. Assign Ticket
Employees can assign tickets to other employees or themselves.
There are 3 ways to assign ticket:
Assign at the ticket information page
Assign Ticket at the ticket updating page
Assign tickets to yourself at the Ticket List page
Mass assign Tickets at the Tickets List page
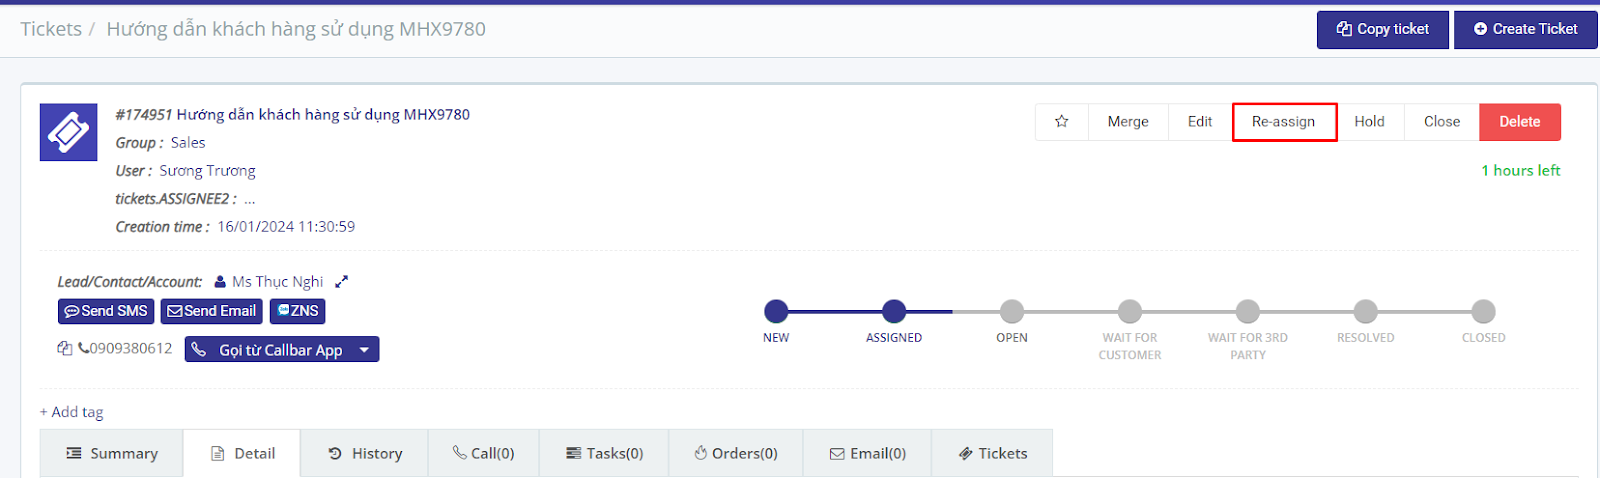
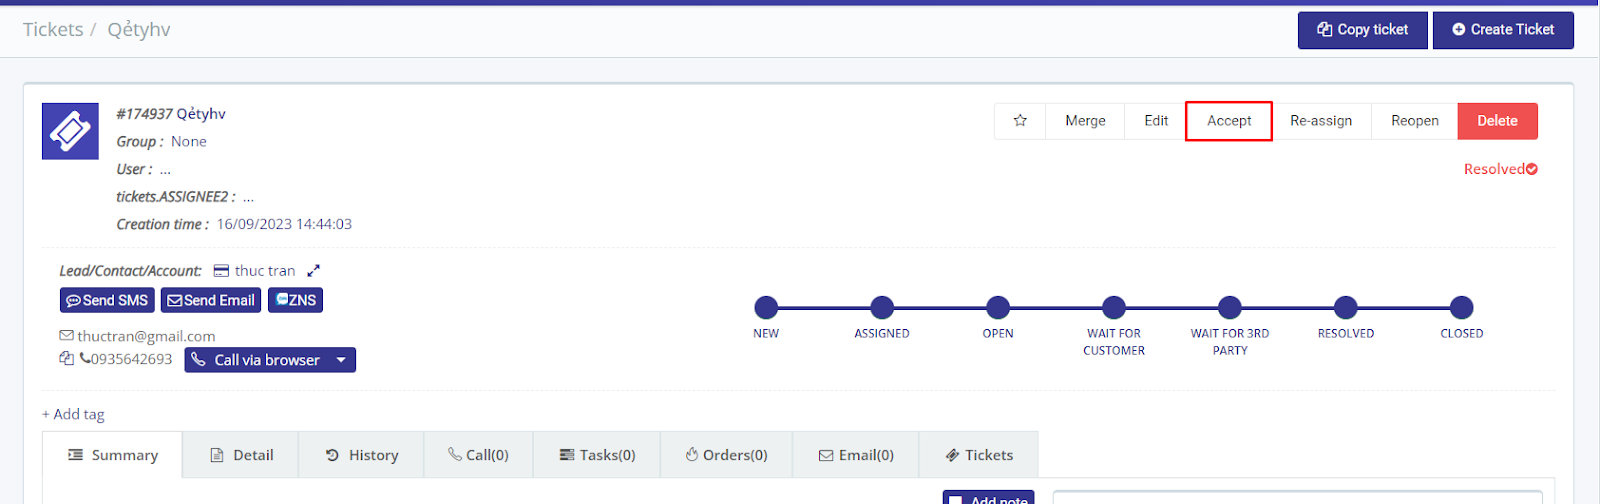
2.1. Assign at the ticket information page
Assign at the ticket information page → choose Re-assign
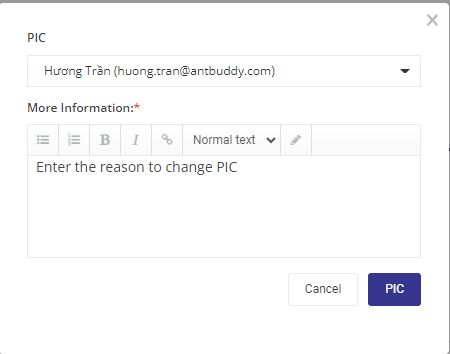
Choose PIC, enter information → choose Assign button
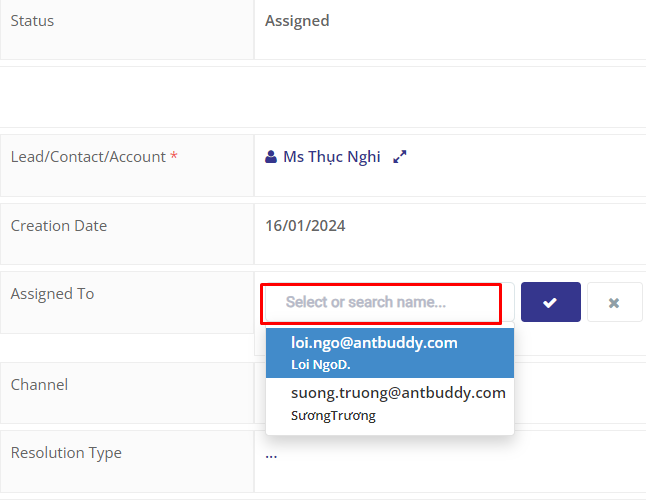
2.2. Assign Ticket at the ticket updating page
Or users can update PIC at the Ticket Update page
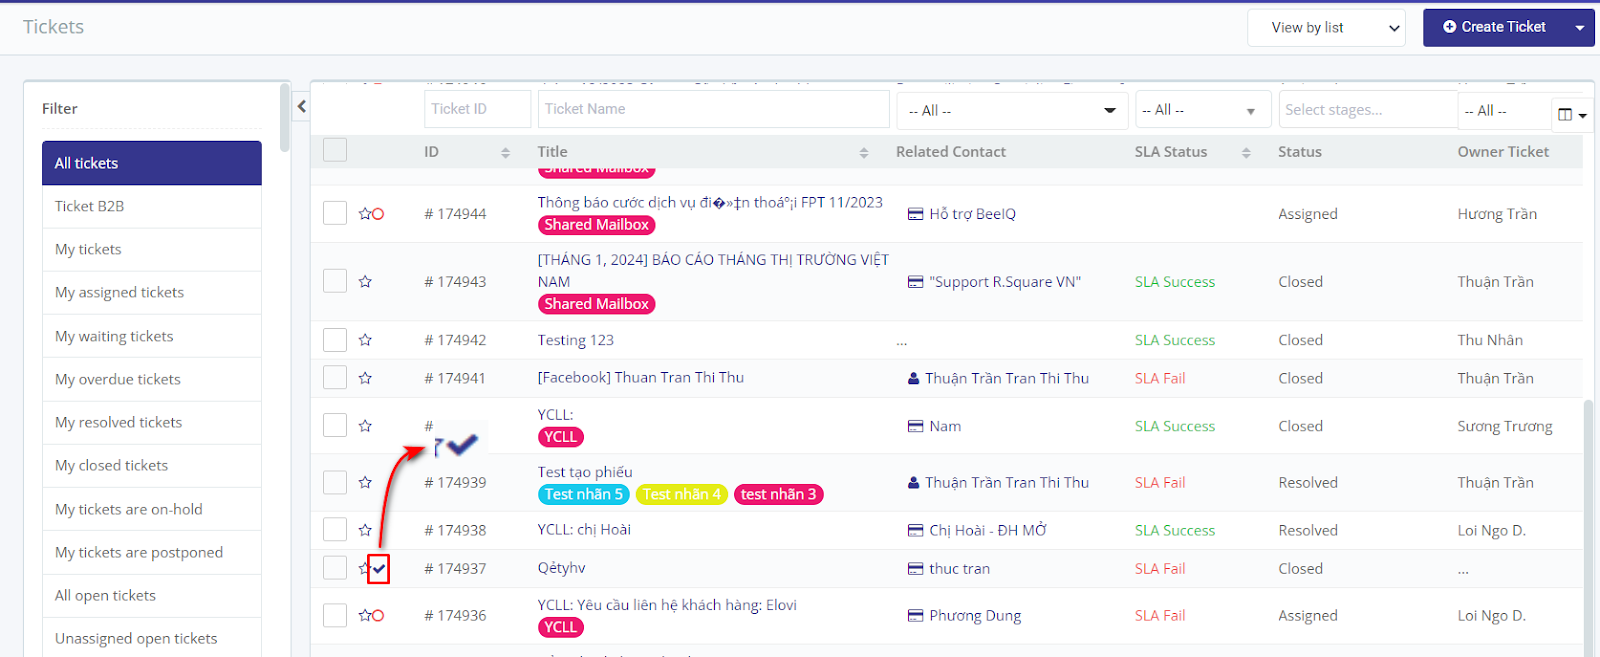
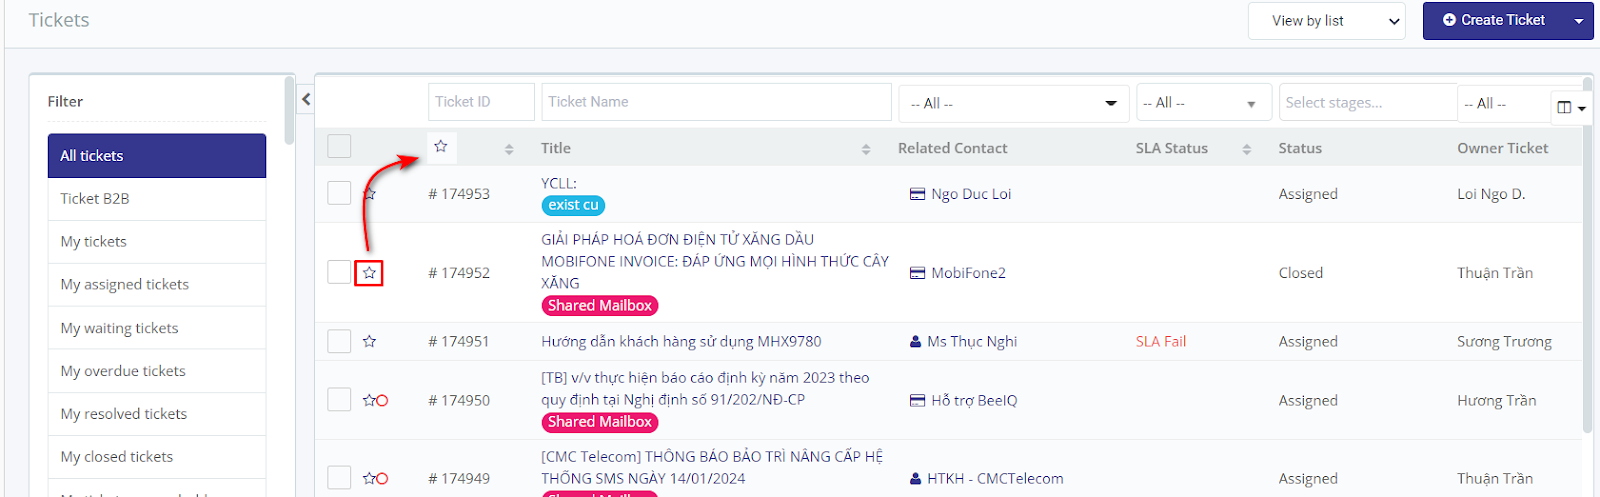
2.3. Assign tickets to yourself at the Ticket List page
Note: Only Tickets that do not have an assigned person can be assigned to themselves
At Ticket list, choose symbol to receive tickets yourself
On the Ticket information page, choose the Accept button, the ticket will automatically assign itself
2.4. Mass assign Tickets at the Tickets list page
It is a way to assign multiple tickets to a fixed employee at the same time or to members of any group according to random or sequential rules. (according to Set up Assignment rule)
Step 1. Open Tickets list page, tick checkbox to choose the tickets need to assign
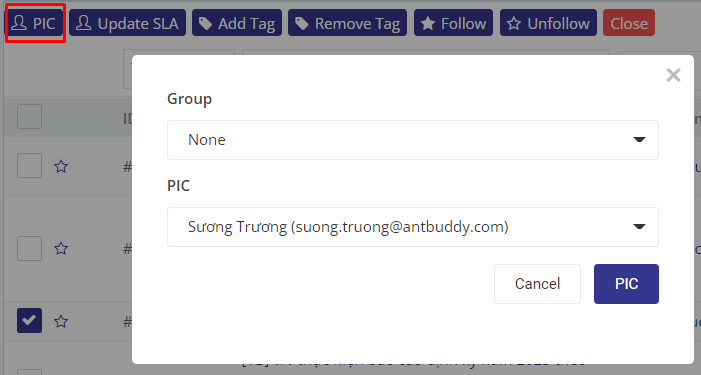
Step 2. Choose operation PIC
Step 3. Choose the object to assign, there are 2 ways to assign:
Assign for individual :
Choose group : “None” or group that contains the employee to be chosen.
Choose PIC as the employee you want to assign.
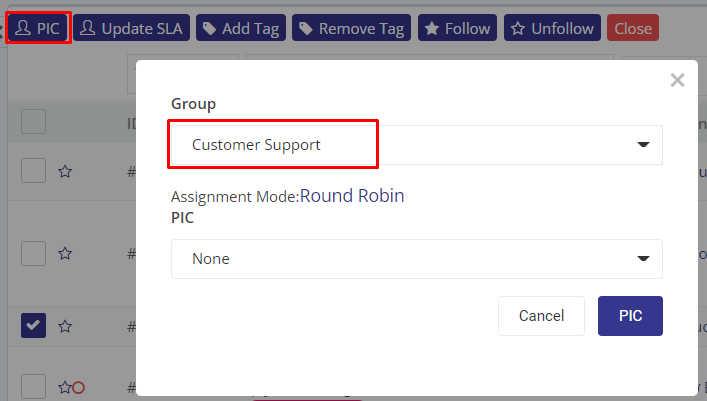
Assign to group employees according to assignment rule:
Choose group: has an assignment rule (sequential or random)
PIC: None
3. Add Followers and Follow
3.1 Add Followers
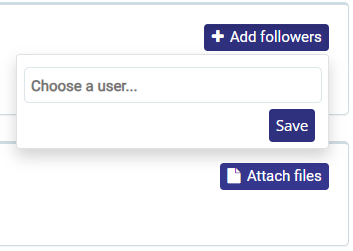
When the assigned person needs more people to support, or more people to hold and update information, the Add Follower feature will be used.
Step 1. At the ticket information page → choose button
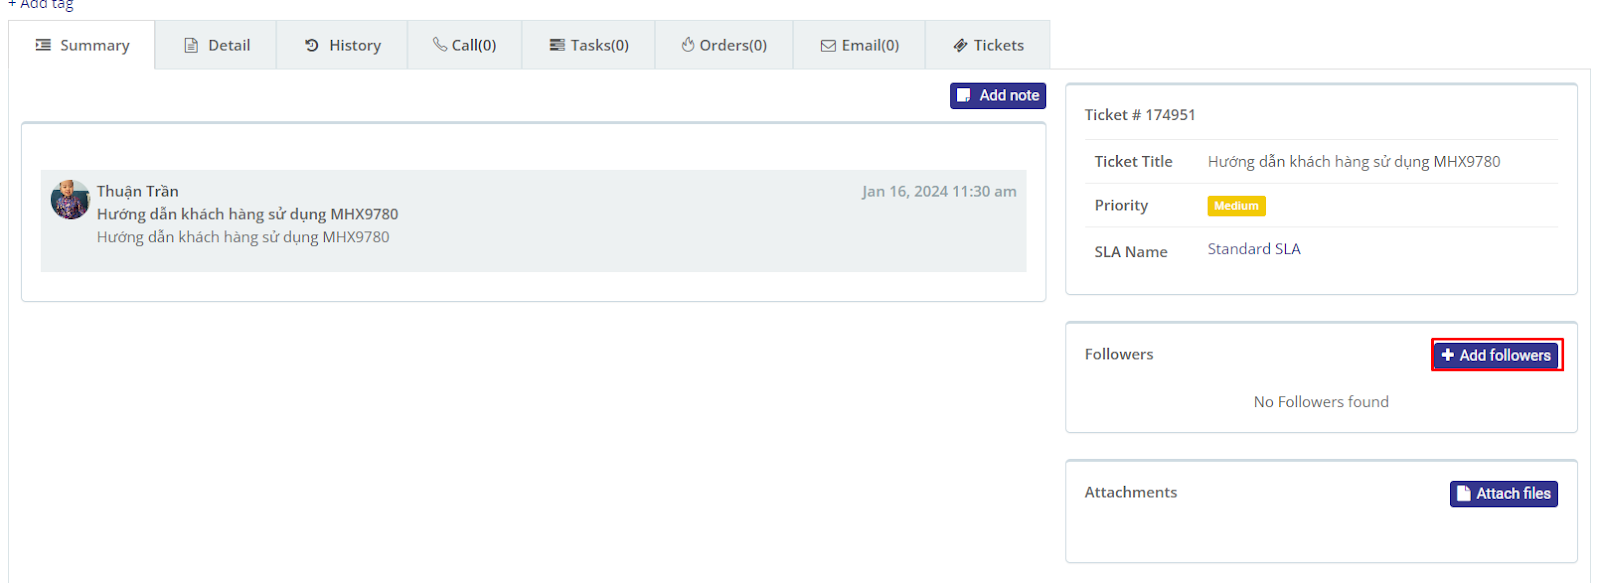
Step 2. Choose the person that you want to add → choose Save
3.2. Follow Ticket
This feature is used when users want to track the tickets they are interested in themselves, without needing other users to add tracking. There are 2 places where people can choose to monitor Tickets
At the ticket list page, user choose Follow icon
Follow Ticket at the ticket information page → choose Follow button
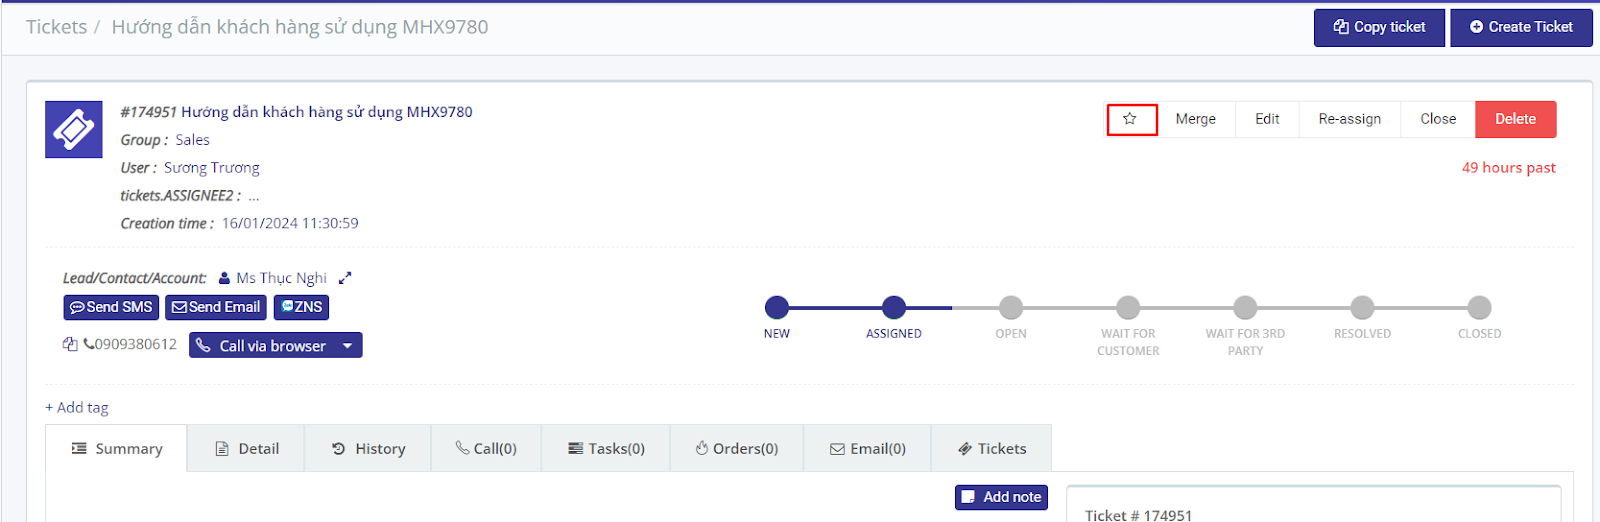
Note: Users can unfollow, even if they are added to follow, and follow themselves by clicking on the icon
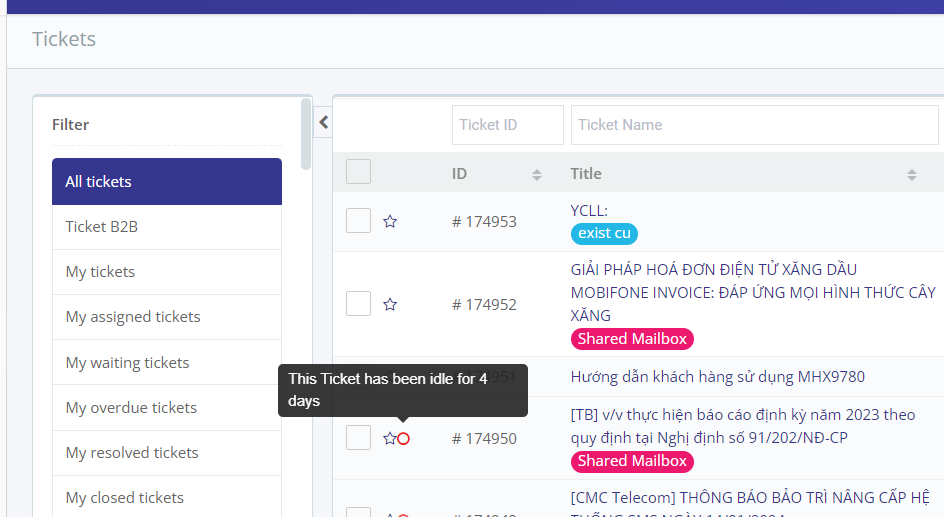
TIP: If a Ticket has not been interacted with (email, call, assigned,...) for 24 hours, the system will automatically mark that Ticket with the icon
3.3. Follow/unfollow a series of tickets
At the Tickets list page, tick the tickets you need to follow/unfollow
Press Follow or Unfollow button

4. Close ticket
The support request has been resolved, the staff member needs to Close the ticket. There are 2 ways to close a ticket:
Close ticket at ticket detail page
Close a series of tickets at the Tickets List page
Note: Only authorized employees are allowed to close tickets
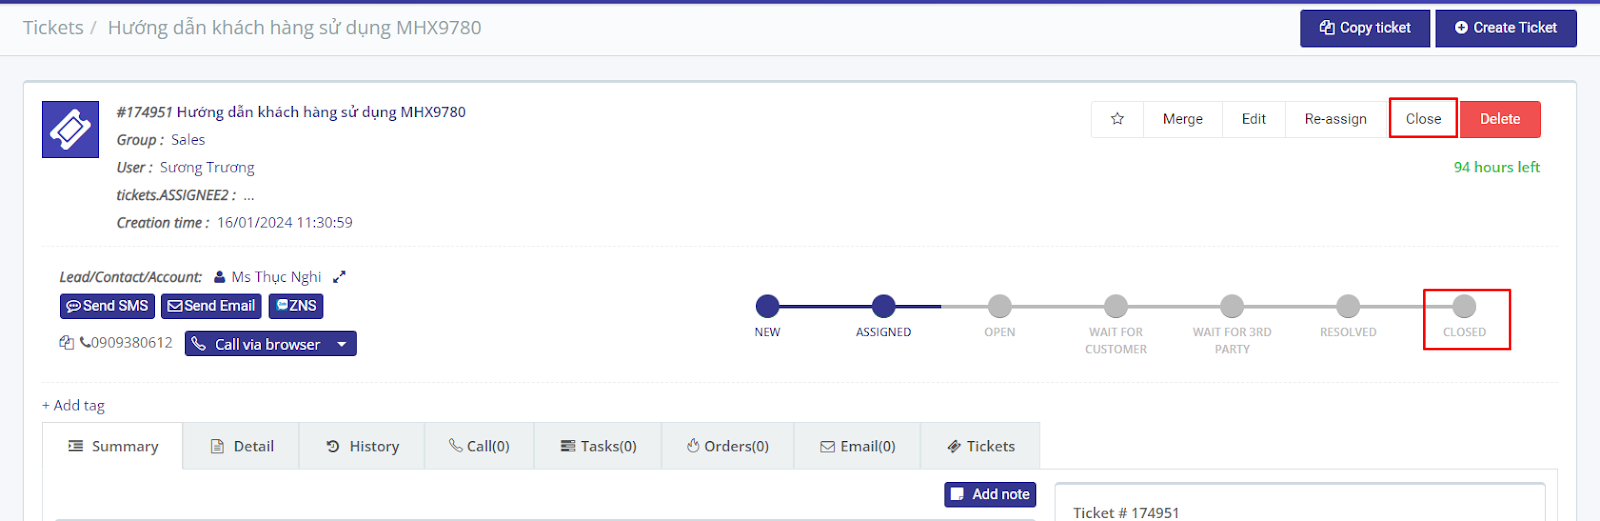
4.1. Close ticket at ticket detail page
At the Ticket information page, click the Close button or click on the Closed status to close the ticket.
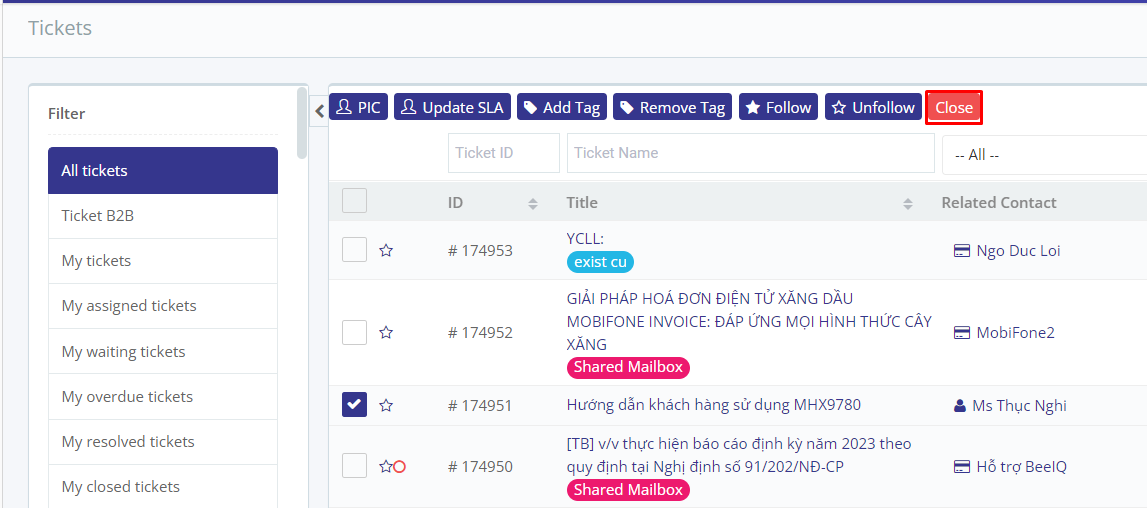
4.2. Close a series of tickets at the Tickets List page
Step 1. Open Tickets list page, tick the checkbox to choose tickets that need to be closed
Step 2. Choose Close .
5. Reopen ticket
When the support request has been resolved but due to some problem it must be resolved again, the staff needs to Reopen the ticket. There are 2 ways to Reopen a ticket:
Reopen the ticket at the ticket detail page
Reopen a series of tickets at the Tickets List page
Note: Only authorized employees are allowed to reopen tickets
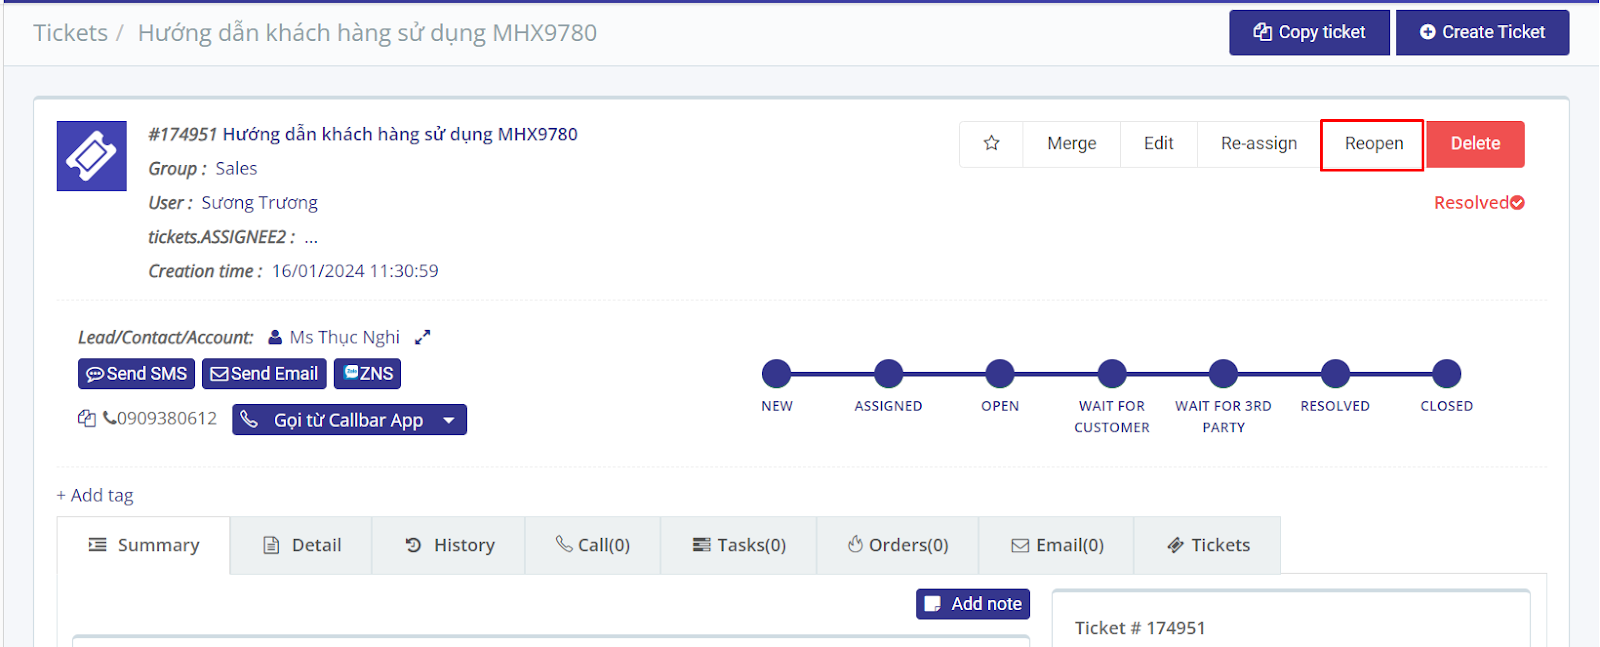
5.1. Reopen the ticket at the ticket detail page
At the Ticket information page, click the Reopen button
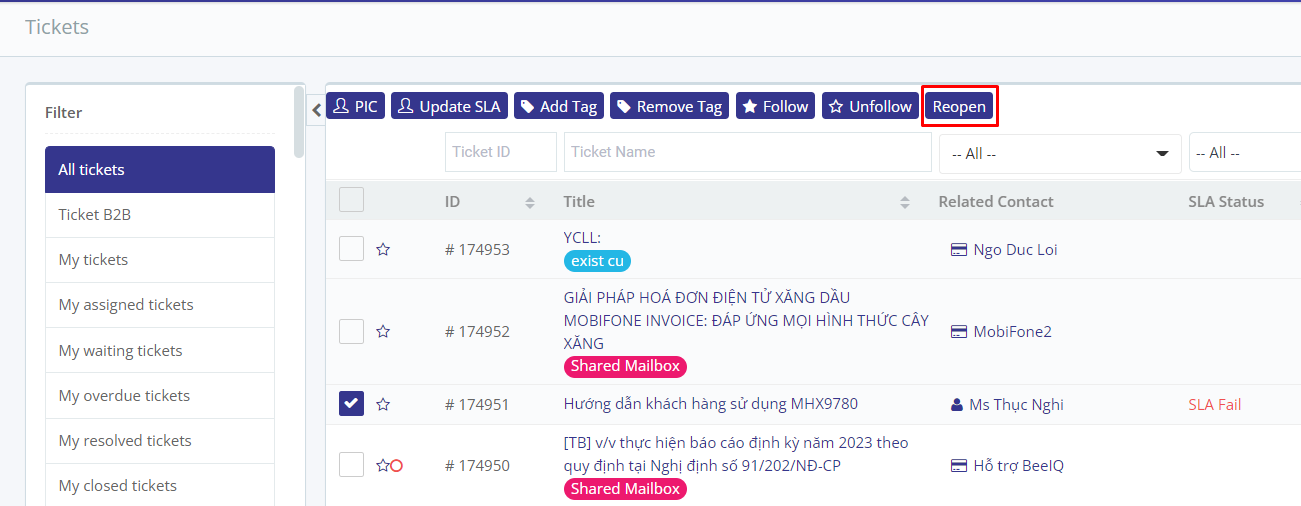
5.2. Reopen a series of tickets at the Tickets List page
Step 1. Open Tickets list page, tick the checkbox to choose tickets that need to be reopened
Step 2. Choose
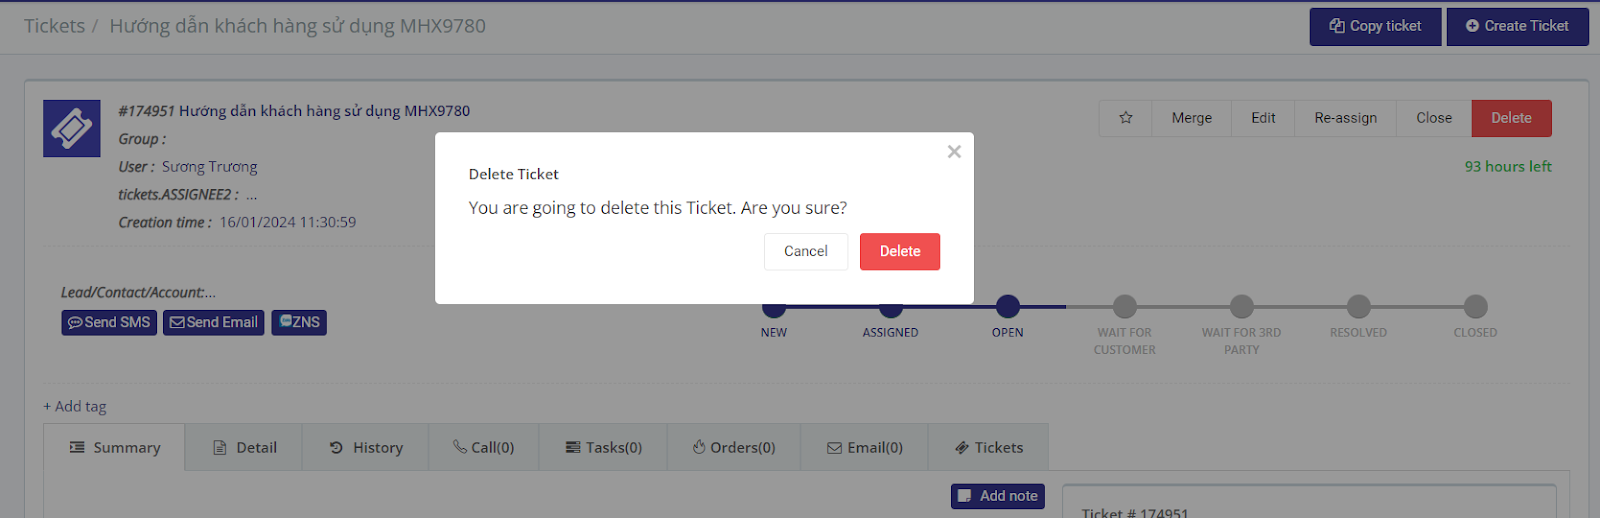
6. Delete ticket
Only Admin and Owner are allowed to delete Tickets
At the ticket information page, press Delete .
Confirm the deletion to complete.
7. Tag for ticket :
For ease of classifying tickets, staff can tag each ticket
There are 2 ways to tag tickets:
Tag on the ticket Details page
Tag a series of tickets on the Ticket List page
7.1. Tag on the ticket Details page
At the ticket information page, press + Add tag
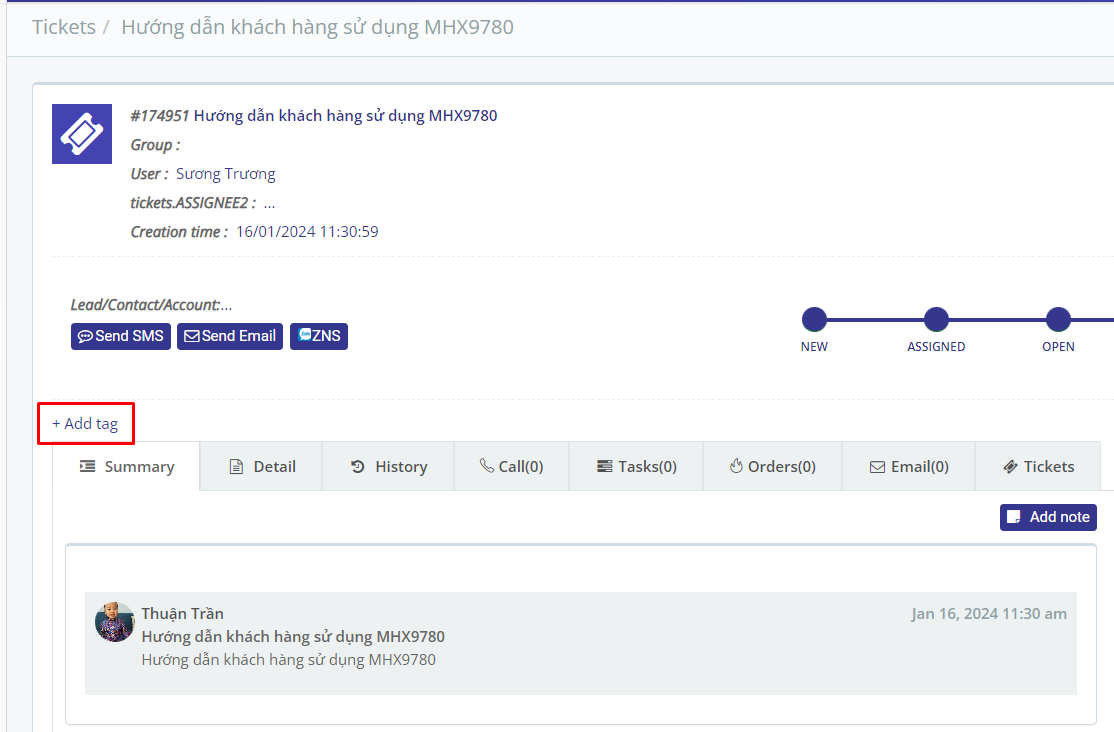
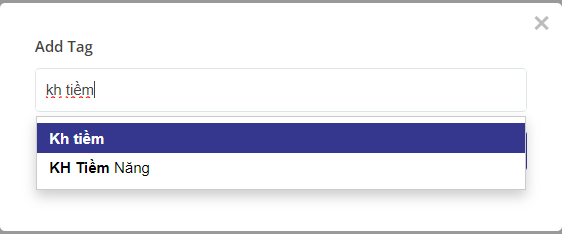
You can add new tags or choose available tags
Enter a tag name and press Enter to create a new tag
Enter search keywords and choose tags to add available tags.
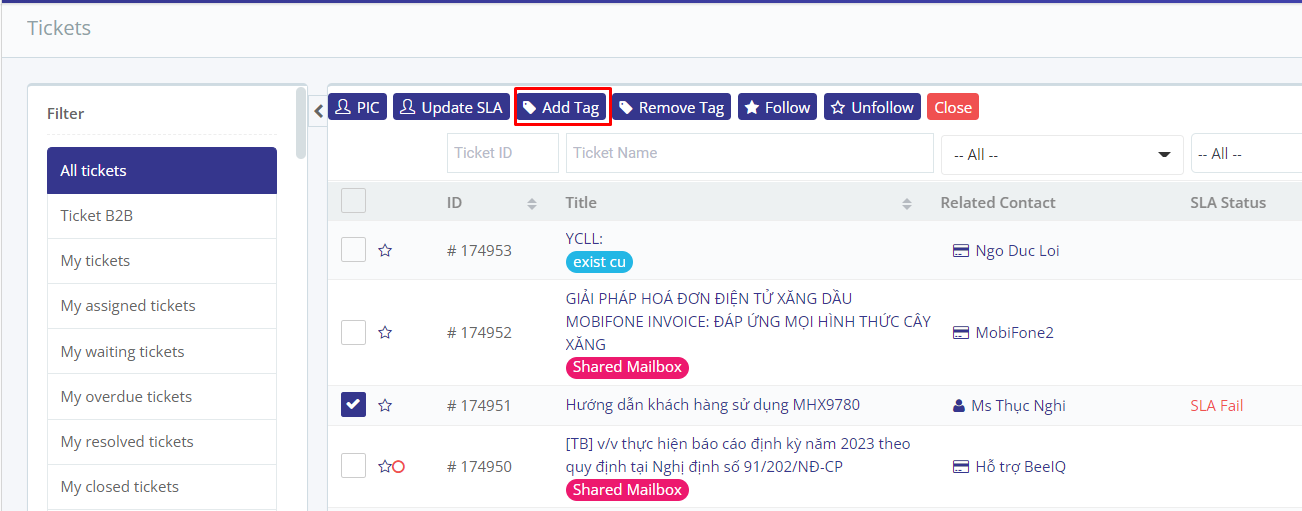
7.2. Tag a series of tickets on the Tickets List page
Step 1. Open the Tickets list page, tick the checkbox to choose the tickets need to tag
Step 2. Choose Gắn nhãn .
You can add a new tag or choose an available tag
Enter a tag name and press Enter to create a new tag
Enter search keywords and choose tags to add available tags.
8. Remove ticket tag
There are 2 ways to remove ticket tags:
Remove the tag at the Ticket Details page
Remove tags from a series of tickets at the Ticket List page
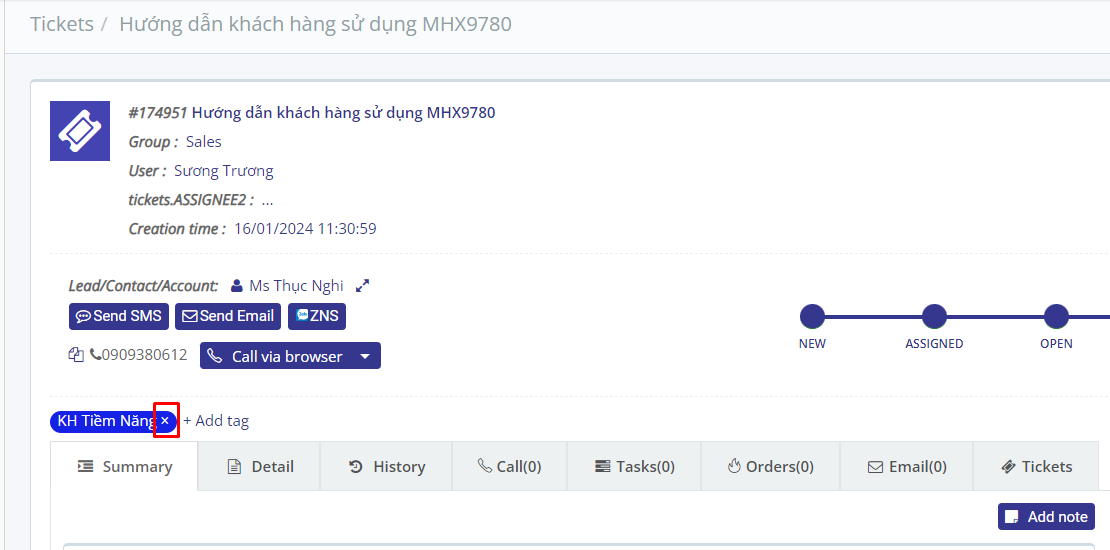
8.1. Remove the tag at the Ticket Details page
On the Ticket information page, click on the X next to the ticket you want to remove
Confirm tag removal to complete the job.
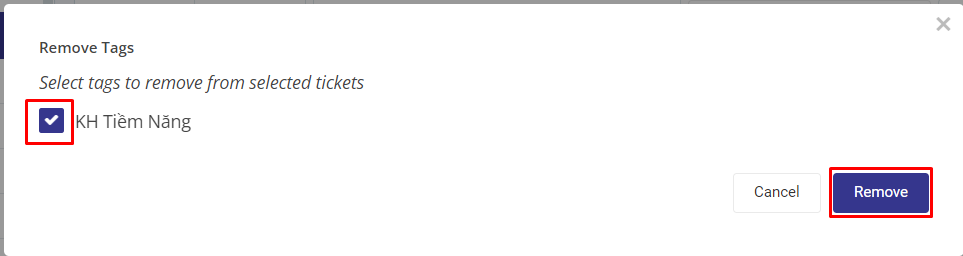
8.2. Remove tags from a series of tickets at the Ticket List page
Step 1. Open the Tickets list page, tick the checkbox to choose tickets that need to be untagged
Step 2. Choose .
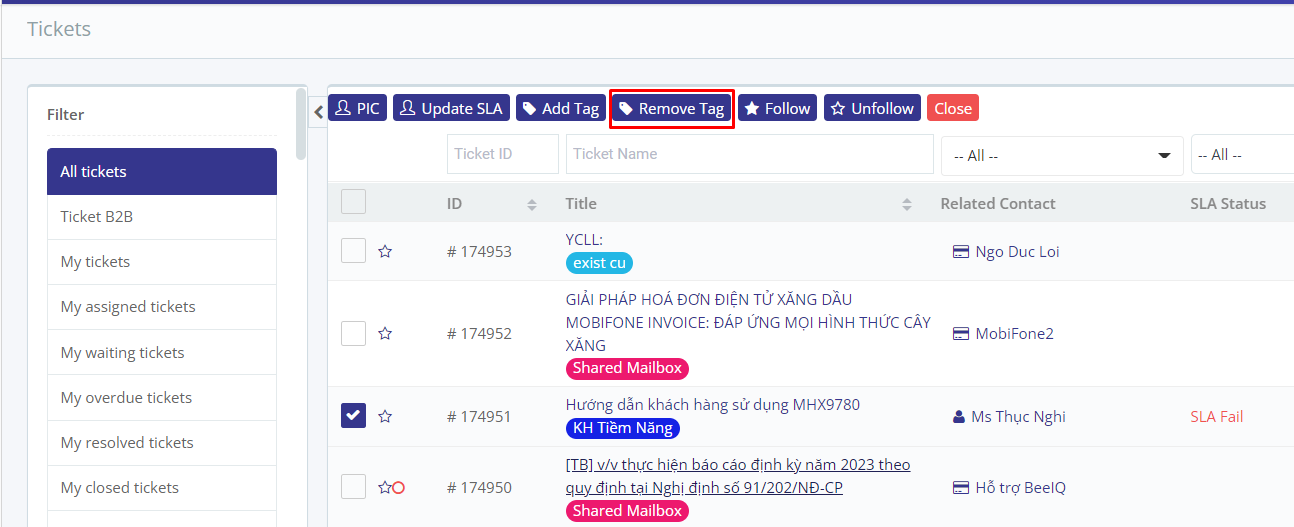
Tick the tag to remove and press Delete
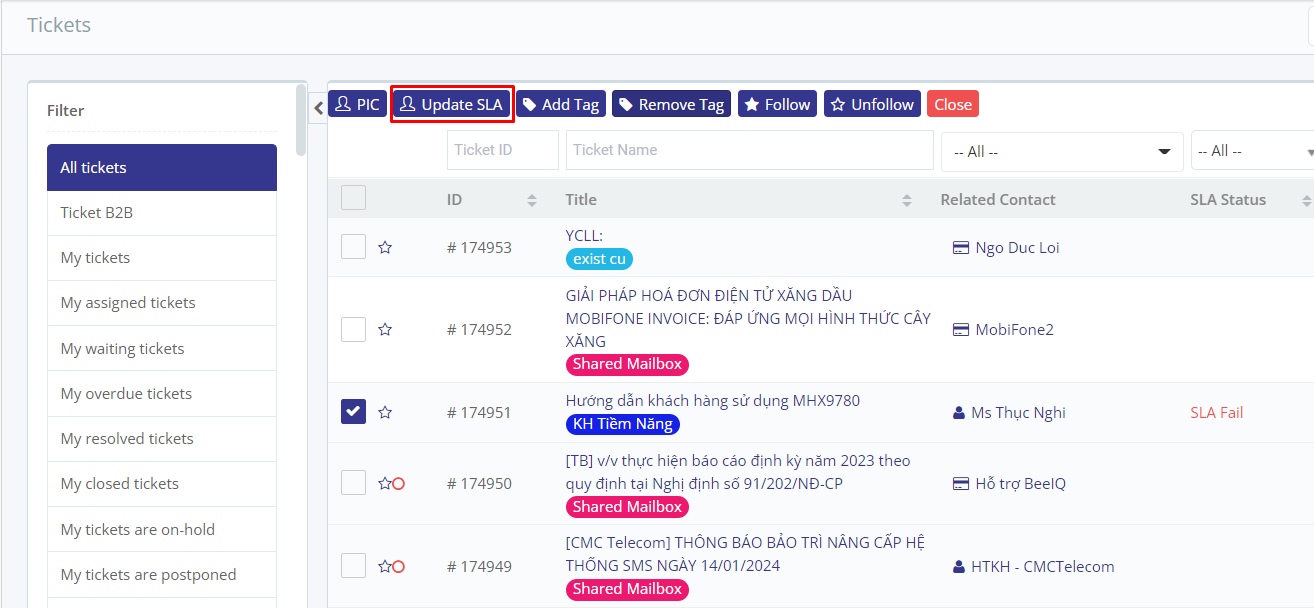
9. Update SLAs for a series of tickets
Below are the steps to update the SLA for a series of tickets.
Step 1. At Tickets list page, tick to choose the tickets that need to change the SLA
Step 2. Press Update SLA button
Step 3. Choose the desired SLA and press Add
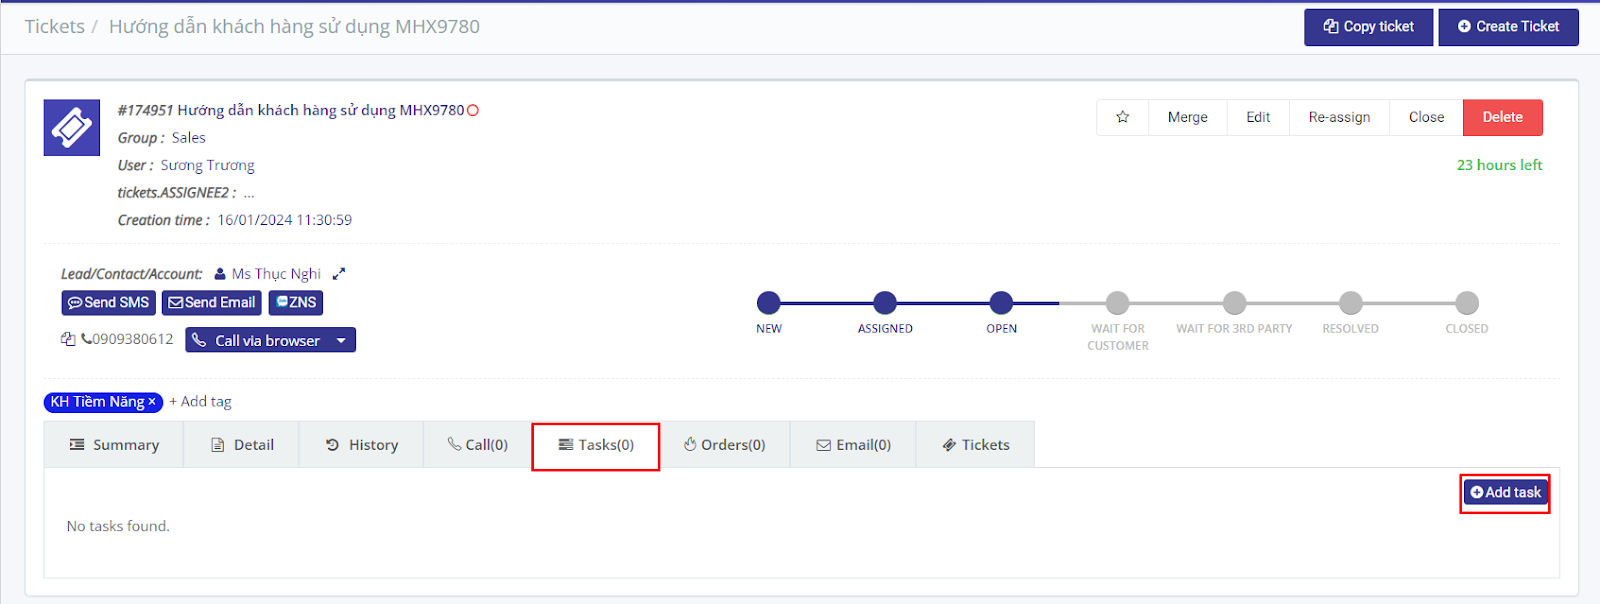
10. Create task for Ticket
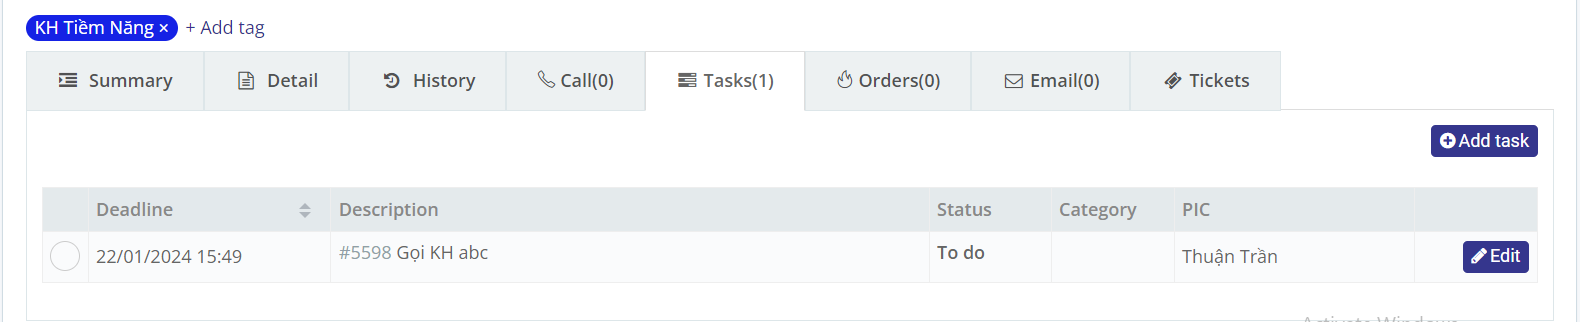
At the Ticket information page, choose Task section → choose add Task
Fill in task information → choose Lưu
11. Create order for Ticket
At the Ticket information page, choose Order section → choose Create a new order
Fill in order information → choose Save
