- Languages
- English
- Popular FAQ
-
Antbuddy Privacy / Date: 17/07/2017 3:12PM View count: 122344
-
Hướng dẫn cài đặt và sử dụng Zoiper trên iOS và Android / Date: 28/12/2018 4:28PM View count: 16298
-
Hướng dẫn cài đặt và sử dụng Grandstream wave trên iOS và Android (Antbuddy) / Date: 28/12/2018 4:26PM View count: 12350
-
Ticket là gì ? Sử dụng như thế nào? / Date: 08/09/2020 9:46AM View count: 11212
-
Hướng dẫn sử dụng chiến dịch BeeIQ Telesales (dành cho quản trị viên) / Date: 08/09/2017 10:24AM View count: 7854
-
Các thao tác chính trong BeeIQ CRM / Date: 08/09/2017 10:36AM View count: 7201
-
Hướng dẫn sử dụng Hệ thống Ticketing trên BeeIQ CRM / Date: 08/09/2017 10:37AM View count: 7040
-
Hướng dẫn cấu hình Email Forwarding BeeIQ CRM / Date: 08/09/2017 10:37AM View count: 6409
-
Hướng dẫn sử dụng Kite Chat (dành cho quản trị viên) / Date: 11/07/2017 7:37PM View count: 6394
-
Video hướng dẫn cài đặt và sử dụng Tổng đài Cloud AntBuddy / Date: 13/09/2017 3:39PM View count: 6338
AntRing - SIP account
1. Introduction
This document supports the Switchboard Operations Department to set up and configure SIP accounts for their Agents.
2. Access configuration page
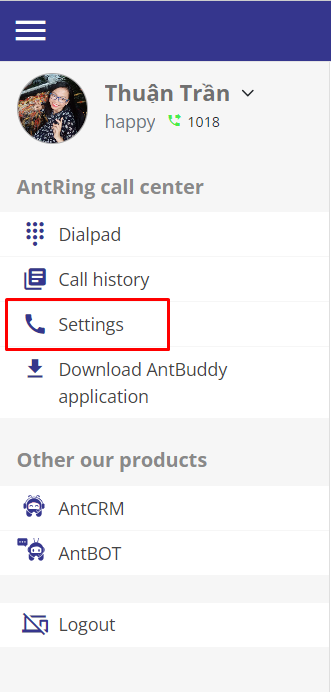
In the main interface, you open main Menu → choose “Settings”
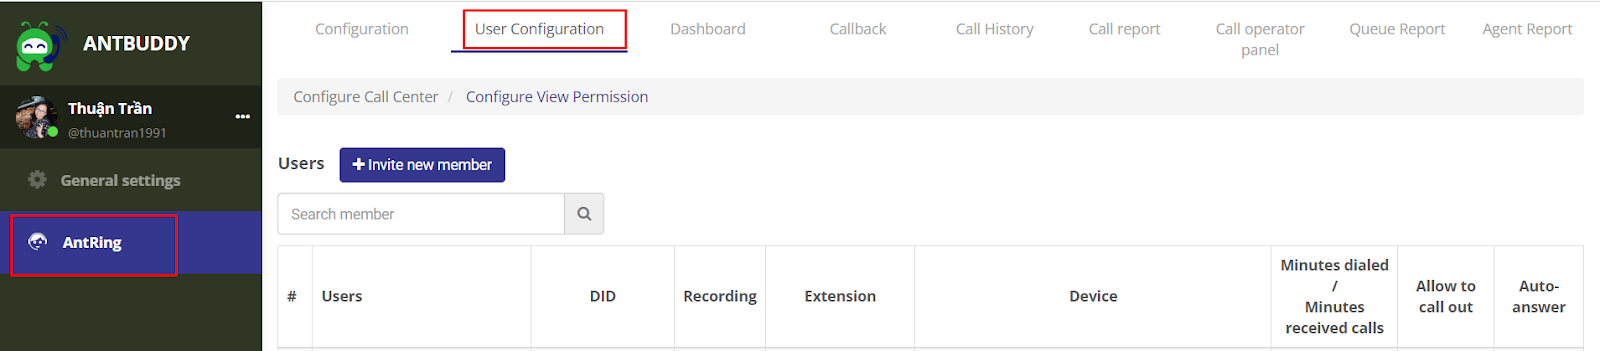
You are redirected to the configuration interface, then choose “AntRing” → choose “User configuration”.
3. SIP account
The SIP account is displayed in the "Device" column. By default, the system will create a SIP account for you.
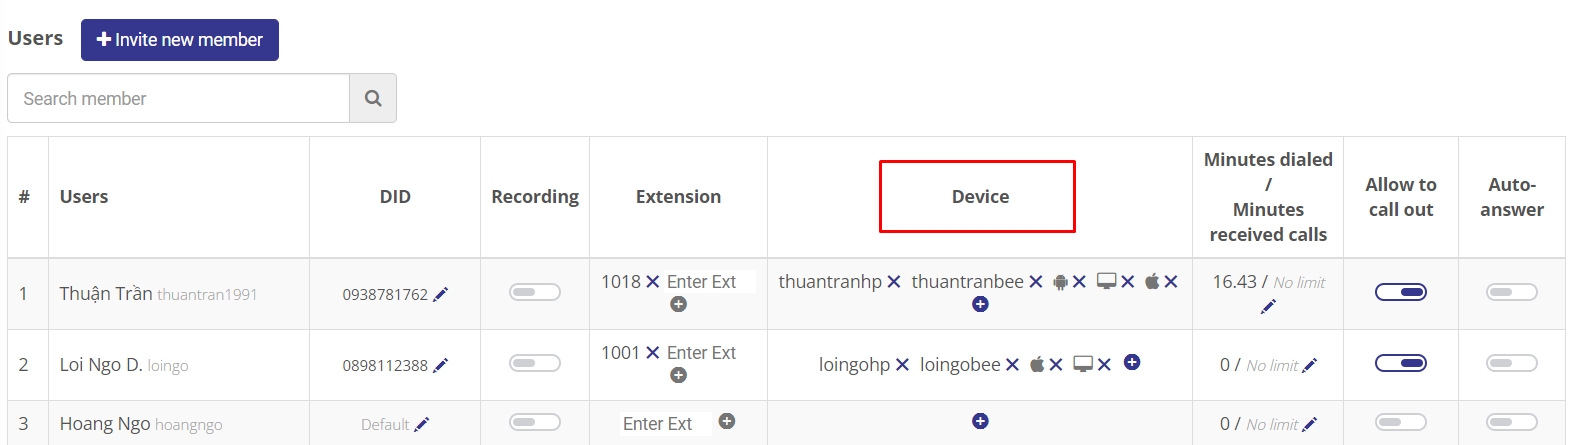
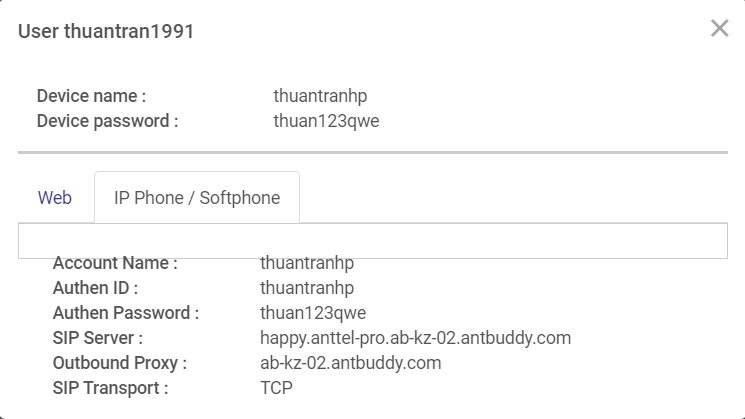
You can click on the SIP device name to view configuration information.
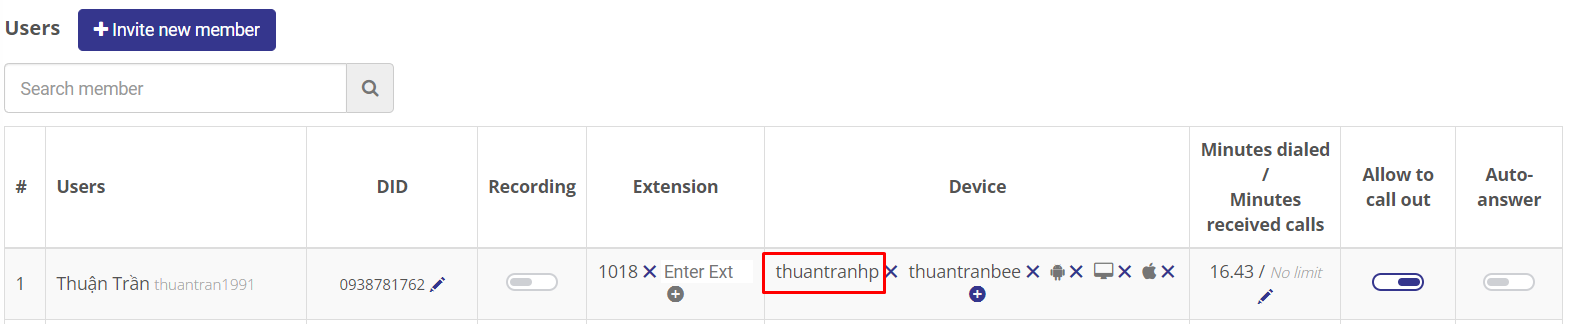
Information for you to configure will be displayed in 2 types: web and IP phone (external device)
If you want to create a new SIP account for the user, choose icon., then fill in the device information as is: device name and password.
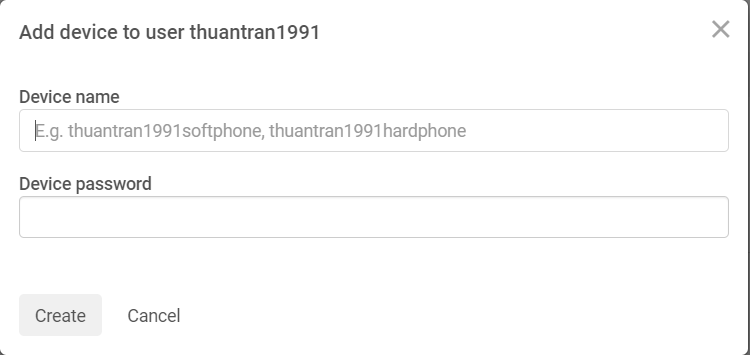
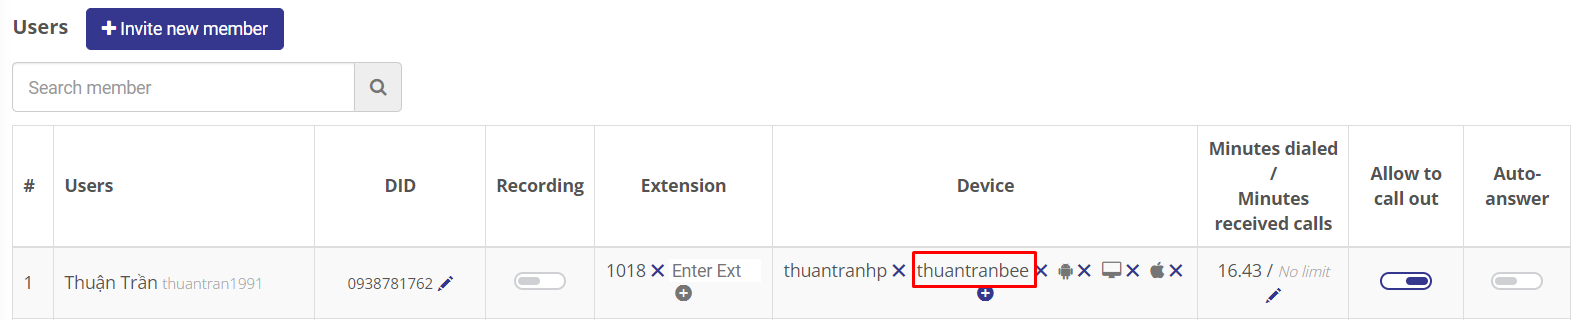
After newly created successfully, you will see the new SIP account displayed in the device column. For users with many devices such as: softphone, hardphone (ip phone), web (supporting SIP account configuration),... you can use this function to create corresponding SIP references
To view the newly created account information, you just need to click on the device name you want to view, the information will be displayed to you, just like the step to view SIP account information above.
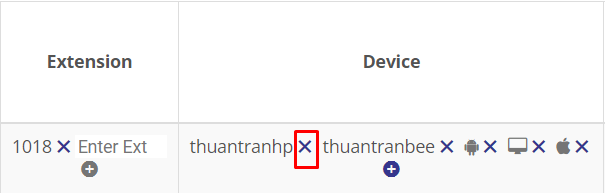
To delete a SIP account, click icon next to the SIP account you want to delete.
4. Add internal number
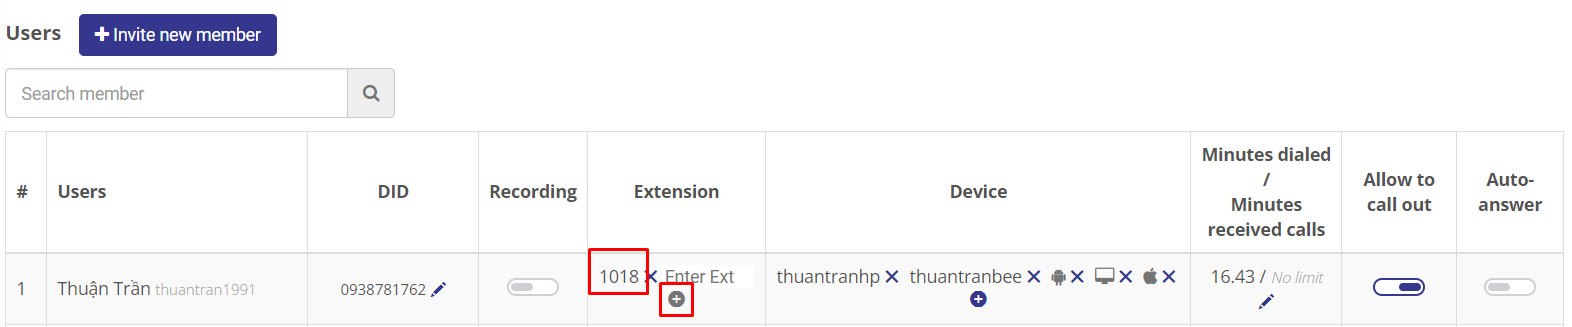
The internal number is also known as a branch number or extension number. It is used for other users to contact each other. It is also used for customers to call the switchboard and press the branch number to contact the Agent quickly. To configure, do the following:
Step 1: Enter branch number you want to add (Limit 2-4 numbers)
Step 2: Press icon
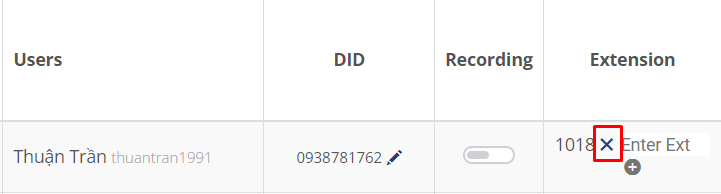
To delete an added internal number, press icon next to the quick number you need to delete
5. Authorize
5.1. Give the number of call out minutes
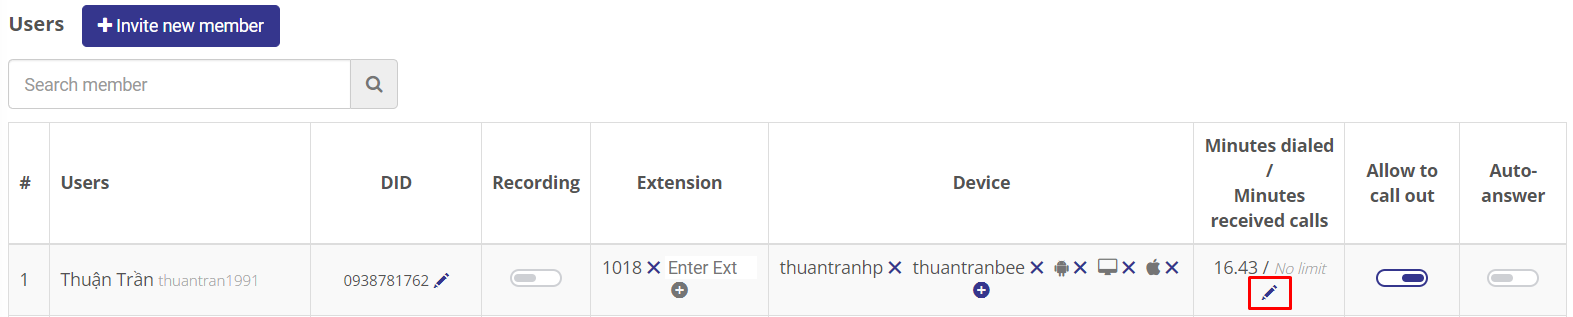
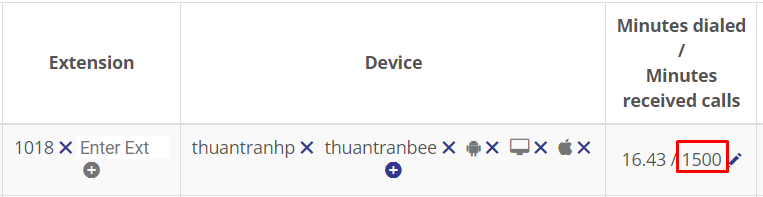
The call out minutes section is used to limit the duration of a user's call out. The configured minutes reset every month. If the user uses up the given minutes, they will no longer be able to make calls. To configure the number of calling minutes, click icon in the column “Minutes disabled/Minutes received calls”.
A configuration window will be displayed as follows:
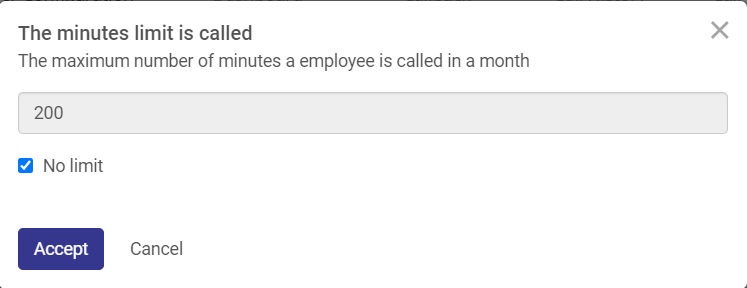
By default, users on Antbuddy are not limited to calling time. If you want to configure or edit the limit time, untick "No limit", then fill in the desired time (time unit here is minutes).
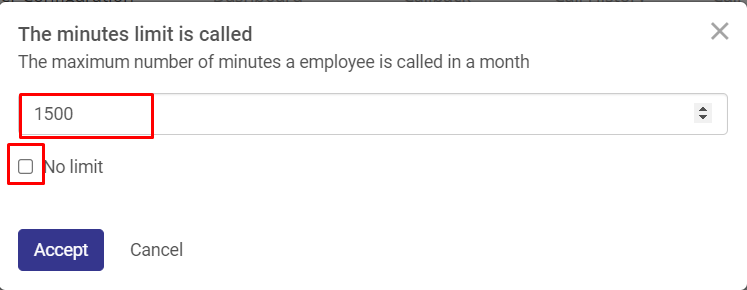
Click "Accept" to save and complete the configuration of calling minutes for the user.
5.2. Give the call out permission
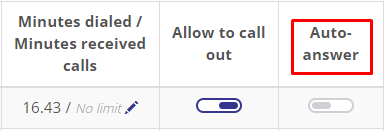
This section allows agents/users to be called out or not. By default, the Antbuddy application allows agents/users on the application to be called out. To configure to allow or block outbound calls for each Agent/user on the system, you just need to switch Disable/Enable the "Allow to call out" column
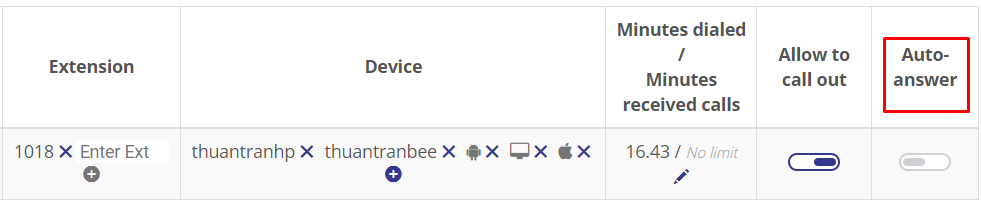
5.3. Automatically answer
"Auto-answer" function to configure Agent/person to automatically pick up the phone when there is an incoming call. The call comes from the hotline number and also from internal calls. This function helps Agents/users not have to do much to pick up a call, they just need to answer the customer. To configure this function, it is as simple as configuring "Allow to call out". You just need to switch the Disable/Enable button in the "Auto-answer" column. By default, this function is turned off..